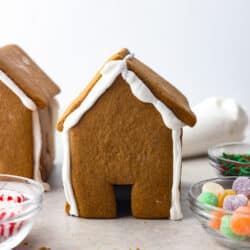
Gingerbread House
Nothing says holiday season like a Gingerbread house sitting on the counter! This recipe includes the recipe for gingerbread, a template to print out the ginger bread house pieces, and how to make the royal icing. This is the perfect recipe for the whole family to enjoy!
Servings: 2 Gingerbread Houses
Ingredients
Gingerbread
- 6 Tablespoons Unsalted Butter Softened
- ¾ Cup Dark Brown Sugar
- 2 Tablespoons Granulated Sugar
- 2 Teaspoons Vanilla
- ½ Cup Molasses Unsulphered
- 1 Egg
- 3 Cups All-purpose Flour
- 1 Tablespoon Ground Cinnamon
- 1 Tablespoon Ground Ginger
- ½ Teaspoon Cloves
- ½ Teaspoon Salt
- ½ Teaspoon Baking Powder
- 2 Tablespoons Milk
Royal Icing
- 4 Cups Powdered Sugar
- 3 Tablespoons Meringue Powder
- 6-7 Tablespoons Water
Instructions
- Preheat the oven to 375° and line two baking sheets with parchment paper. Set aside.
- In the bowl of a stand mixer, use the paddle attachment to beat together the butter, both sugars and vanilla until light and fluffy, about 3 minutes. Scrape down the sides and bottom of the bowl and add the molasses and egg. Beat again for 1-2 minutes, until incorporated.
- In a medium bowl, whisk together the flour, cinnamon, ginger, cloves, salt, and baking powder. Add the dry ingredients to the wet and mix on low until a dough begins to form. Scrape down the sides and bottom of the bowl again before mixing on medium speed. Add the milk to help the dough not be too crumbly.
- Transfer the dough to a lightly floured surface and roll out to ¼ inch thick. Using the already printed and cut out template for the house pieces, use a sharp paring knife to cut out the pieces of the house.
- Carefully transfer the cut-out pieces to the prepared baking sheets, leaving at least 2 inches between them. Bake for 11-14 minutes, until the edges and centers are set. Let cool completely on the baking sheets.
- Once completely cooled, prepare the royal icing to use as glue for construction.
- In the bowl of a mixer, add the powdered sugar and meringue powder. Whisk together. Add 4 tablespoons of water and use the paddle attachment to mix on low speed. As the powdered sugar becomes more moistened as it mixes, increase the speed and beat until a very thick, smooth icing is made. If it is not moist enough to incorporate all the dry ingredients, add the 5th tablespoon of water. This icing should be very, very thick in order to hold together the heavy gingerbread.
- Transfer the royal icing to a piping bag or a large ziplock bag. It will dry quickly if left exposed, so be sure to cover any extra icing tightly with plastic wrap.
- Assemble the houses by using the royal icing as glue. Be generous and work quickly, as the royal icing will begin to crust over quite quickly. Pipe icing along the side of the front of the house then press the side piece to it to form the first corner. Repeat with the second side.
- Pipe icing along the two sides of the back piece and press firmly against the two standing sides to form the third and fourth corners. Add more icing the inside of the corners as needed to reinforce their stability.
- Pipe icing along the roofline and top of the side on one side of the house. Press the first roof piece in place. Outline the remaining opening with icing and carefully press the last roof piece on. This is the trickiest piece to put on and must be done carefully so the rest of the house does not collapse.
- Allow the houses to sit at least 24 hours to let the royal icing dry and harden before decorating.
Nutrition
Calories: 2616kcal | Carbohydrates: 546g | Protein: 28g | Fat: 39g | Saturated Fat: 23g | Polyunsaturated Fat: 3g | Monounsaturated Fat: 10g | Trans Fat: 1g | Cholesterol: 174mg | Sodium: 768mg | Potassium: 1836mg | Fiber: 8g | Sugar: 392g | Vitamin A: 1206IU | Vitamin C: 0.2mg | Calcium: 406mg | Iron: 15mg