This website may contain affiliate links and advertising so that we can provide recipes to you. Read my disclosure policy.
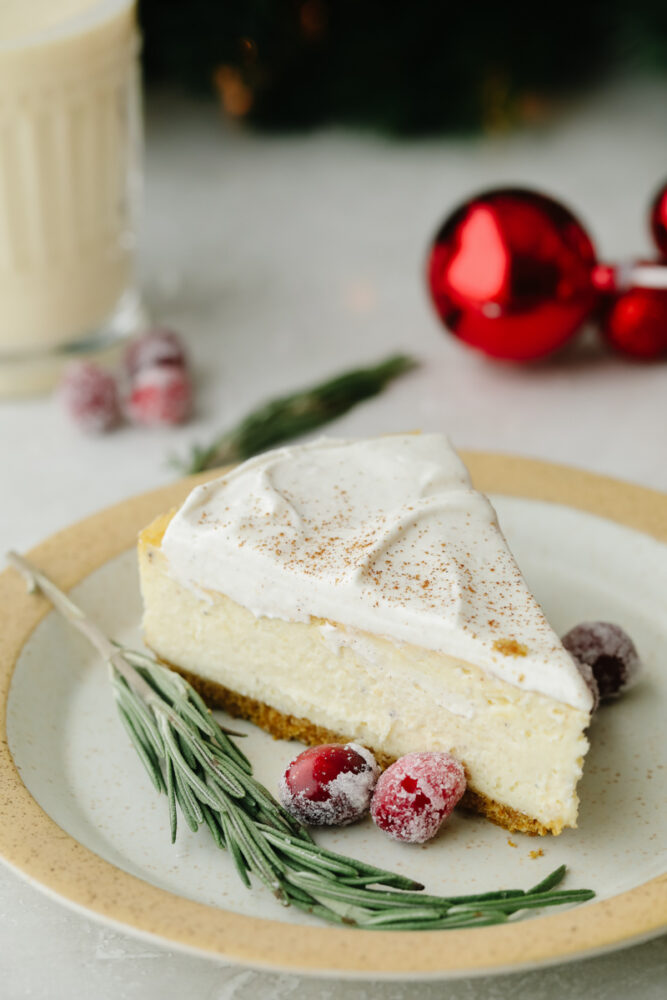
This eggnog cheesecake is SOO GOOD. It’s creamy and melts in your mouth! That classic eggnog taste makes it the best dessert for the holiday season!
I can’t get enough of cheesecake! Some of my favorites are Peppermint, Pecan Pie, and this delicious Churro Cheesecake! They are all so different but so, so good!
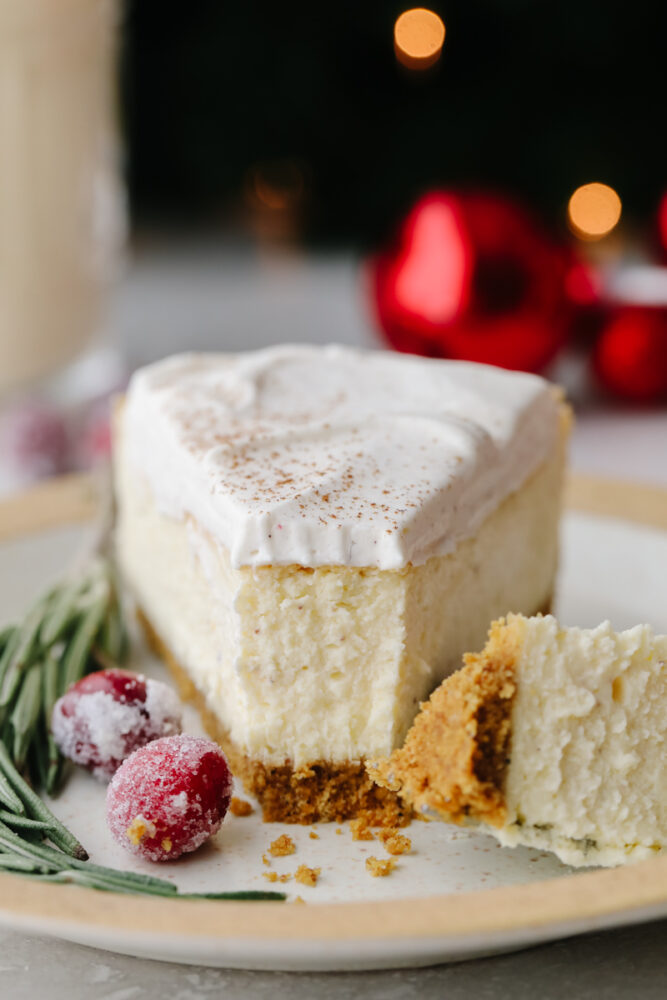
Classic Eggnog Cheesecake
Well, putting two of my favorite things together in one (like this eggnog cheesecake!) really turned out amazing! This dessert could not be more perfect for your holiday dinner! In fact, it’s so good that I would bake it at least once now so you can see how good it is. Because you will definitely want to bake it again later! It has the perfect amount of eggnog flavoring. It’s not too strong but you can definitely taste it.
Eggnog is already so creamy that it complements the texture of a cheesecake so well! And not only does it taste amazing but it looks gorgeous! These sugared cranberries make the perfect topping for it! Don’t be intimidated by baking a cheesecake. I have added so many tips and tricks to this post that will help yours turn out just right! Go ahead and give it a try, you will be so glad that you did!
Ingredients for Eggnog Cheesecake
These ingredients are fairly simple! I especially love the eggnog combined with the nutmeg… It’s so festive! See the recipe card at the bottom of the post for exact measurements.
- Graham crackers: You will crush these up to make graham cracker crumbs!
- Sugar: This sweetens the crust up a bit.
- Ground Nutmeg: I love the flavor that nutmeg brings. It reminds me of the holiday season!
- Butter: I melted the butter to mix the crust all together.
- Salt: Just a pinch will work!
Cheesecake
- Cream Cheese: Set your cream cheese out about 30 minutes before you start baking. When you soften it to room temperature then it mixes up so smoothly!
- Eggnog: You can use store bought eggnog or you can make this Homemade Eggnog! It’s soo good.
- Granulated sugar: This adds some sweetness to balance out the tangy cream cheese.
- Eggs: I used large eggs that were at room temperature.
- Ground nutmeg: This will pull in that same flavoring from the crust. They go so well together!
- Vanilla: This adds a little flavoring to the sweetness.
- Rum Extract: This is totally optional so you can leave it out if you want!
Whipped Cream Topping
- Heavy Whipping Cream: This is what you will mix up to make that fluffy topping which completes this eggnog cheesecake.
- Eggnog: You can use store bought eggnog or you can make this Homemade Eggnog!
- Ground Nutmeg: Adds a tiny bit of earthy flavor to the whipped cream.
- Powdered sugar: This dissolves the easiest so it will help make the whipped cream smooth.
Let’s Bake a Cheesecake!
If you’ve never made a cheesecake then you should definitely try this eggnog cheesecake! Master it just in time for the holidays and everyone will be so impressed!
Crust
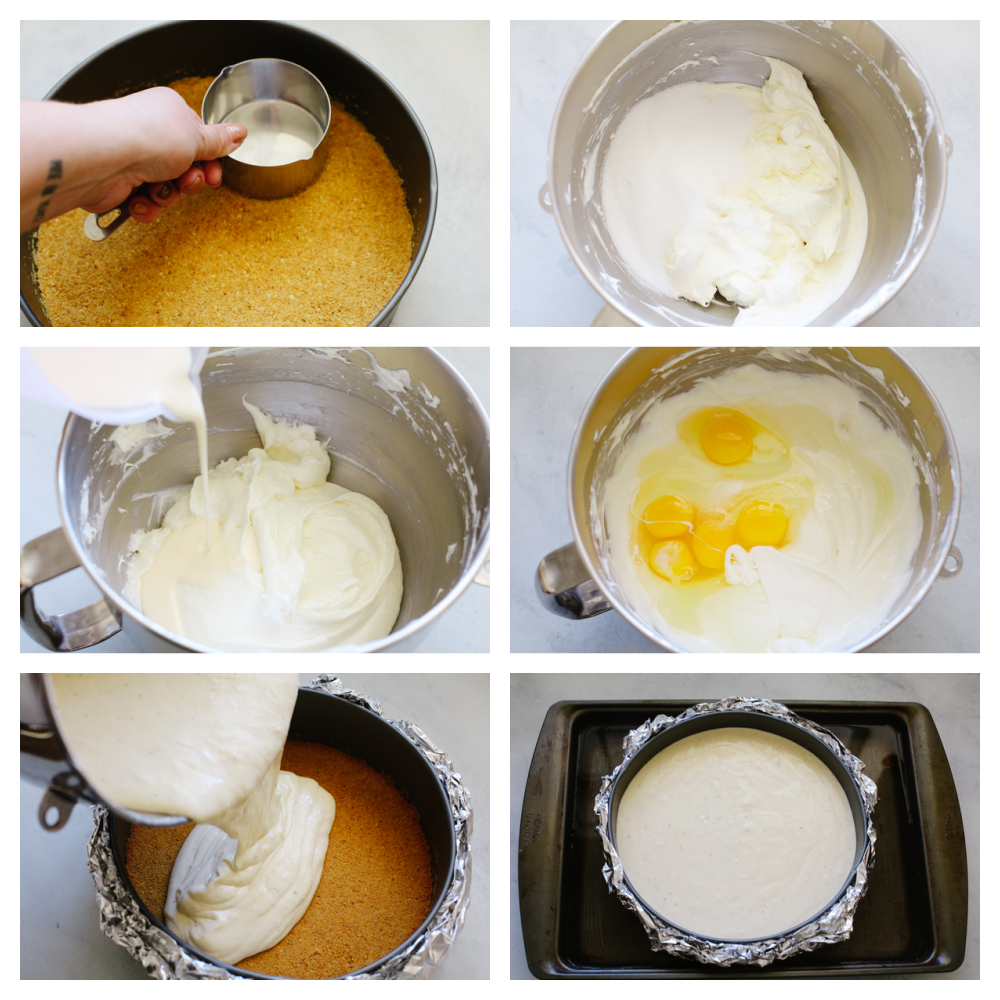
- Preheat oven and mix ingredients: Preheat the oven to 325. In a medium bowl mix graham cracker crumbs, sugar, nutmeg, salt and melted butter together. This should resemble damp sand.
- Form into pan: Pour your crumb mixture into a 9 inch springform pan and press evenly into the pan. You can use the bottom of a flat glass or a flat measuring cup to really press it in well and get a nice, even crust.
- Bake and cool: Bake for 10 minutes. Let cool completely
Cheesecake Filling
- Beat cream cheese: Add the softened cream cheese to the mixing bowl of a stand mixer and beat with a paddle at medium/high speed for about 1 minute. Scrape down the sides and bottom of the bowl and beat for a few seconds more.
- Combine with sugar and eggnog: Add the sugar to the cream cheese and mix at medium-low speed until just combined. Scrape the bowl again and slowly add the eggnog until it is combined and the batter is smooth.
- Add eggs and beat: Add eggs and beat on low speed until combined, about 30 seconds-1 minute. Scrape the bowl again.
- Mix in the rest of the ingredients: Add the nutmeg, vanilla and rum extract. Beat until just combined. At this point the batter should be smooth and fairly runny.
- Wrap springfoam pan with foil: Using 18 inch heavy duty aluminum foil, wrap the outside of your springform pan with 3-4 sheets of foil.
- Add cheesecake batter to pan: Place the wrapped pan in a deep roasting pan. You can alternatively use a baking sheet, so long as the sides are about 2 inches deep. Add the cheesecake batter to the springform pan.
- Add water to baking sheet (a water bath): Using very hot water, add water to the baking sheet until there is about 1 ½ inch of water around the springform pan. On a rack in the lower 3rd of the oven, carefully move your pan into the oven.
Baking Cheesecake
- Bake: Bake for 1-1 ½ hours. After about an hour of baking, check the cheesecake’s consistency. A slight jiggle of the pan (while still in the oven) should tell you if it’s ready or needs more time. The cheesecake should be jiggly, but not liquid. If it seems very liquid still, give it 15 more minutes and check it again.
- Turn off oven and leave it IN THE OVEN while it cools: Once the cheesecake is firm, yet jiggly, turn the oven off but leave the eggnog cheesecake in the oven for another hour or so, until the oven has cooled down. Resist the temptation to open the oven during this time! The purpose of this step is to allow the cheesecake to cool slowly as the oven cools. Doing this will prevent it from cracking, as one of the biggest reasons cheesecakes crack is the drastic temperature change going from the hot oven into the much cooler kitchen.
- Chill in fridge: Once the oven and the cheesecake are cooled, remove from the oven and carefully remove the foil lining the pan. Chill in the fridge for at least 6 hours.
- Release springform with knife, top and serve: Before serving, run a knife around the edge of the pan to ensure an easy release when the springform is removed. Top with the whipped cream topping and enjoy!
Whipped Cream
- Mix ingredients: sing a stand mixer with the whisk attachment or a hand mixer, whip the heavy cream, eggnog, nutmeg and powdered sugar together until medium still peaks form.
- Add whipped cream and garnish: Spread the whipped cream over the top of the cheesecake and dust lightly with ground nutmeg.
How to Prevent Cheesecake from Cracking
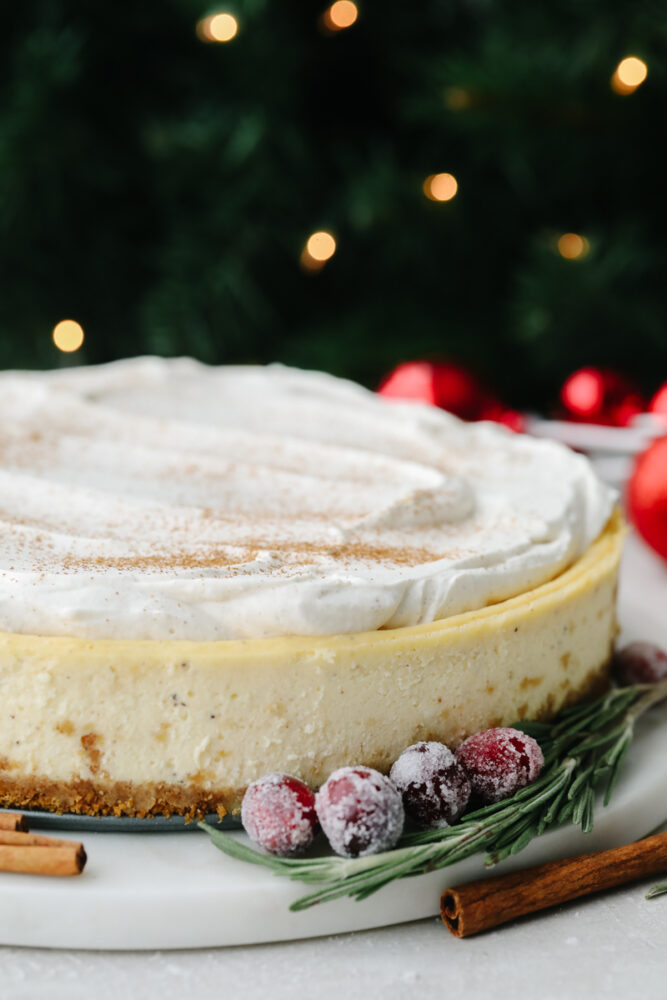
Whenever you see a professional cheesecake, it is smooth with no cracks! Here is how you can get your eggnog cheesecake to do that!
- Let it cool IN THE OVEN: I can’t stress the importance of this enough! Once the cheesecake is done cooking then you turn the oven off then leave the cheesecake in the oven for another hour. Keep it in there until the oven has completely cooled down.
- Don’t open the door: Doing this will prevent it from cracking. One of the biggest reasons cheesecakes crack is the drastic temperature change going from the hot oven into the much cooler kitchen.
Baking Tips
These are good baking tips to remember whenever you are making something in the kitchen! This eggnog cheesecake is so good and you want to follow all of the steps to make sure that it turns out perfectly!
- Don’t overmix: When you over mix or set your mixer to mix on high then you add more air to your batter! This can cause some cracks in your cheesecake. To prevent this then you should use room temperature ingredients. Then you don’t have to mix so many lumps and you can do it on a lower speed.
- Don’t use a toothpick: Using a toothpick to check for doneness is not something that you want to to with a cheesecake! It will cause it to crack. If it is firm yet slightly jiggly, then you can turn off the oven and let it cool (in the oven… again, I can’t stress this enough!)
- Don’t open the oven door: I know that it’s tempting to open the oven door while you are baking your cheesecake. But when you open the door while you are baking, you let a lot of the heat out. This makes it so that your cheesecake will crack. Use the oven light instead of opening the door!
- Room temperature ingredients: This can take a bit of thought beforehand but it really helps! Make sure to take all of your refrigerated ingredients out and put them on the counter before you plan on baking. Bringing your ingredients to room temperature really helps them mix nicely together and makes the batter really smooth!
How to Store Leftovers
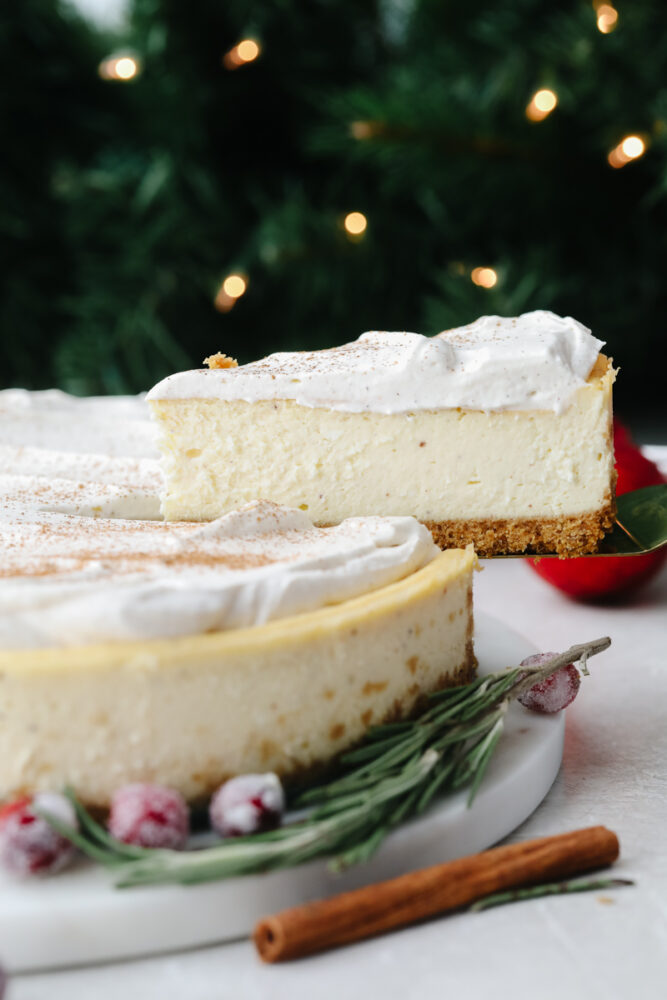
If you have leftover eggnog cheesecake then you should place it in an airtight container and put it in your fridge. It can last for about a week!
Pin this now to find it later
Pin It
Eggnog Cheesecake
Ingredients
Crust
- 1 ½ cup graham cracker crumbs about 12 crackers
- ¼ cup sugar
- ½ Teaspoon Ground Nutmeg
- ¼ cup butter melted
- Pinch salt
Cheesecake
- 2 Pounds Cream Cheese Softened (4 8oz packages)
- 1 Cup Eggnog
- 1 Cup Granulated Sugar
- 5 Large Eggs
- ¾ Teaspoon Ground Nutmeg
- 2 Teaspoons Vanilla
- ½ Teaspoon Rum Extract optional
Whipped Cream Topping
- 1 Cup Heavy Whipping Cream
- 3 Tablespoons Eggnog
- ¼ Teaspoon Ground Nutmeg
- 1/4 Cup Powdered Sugar
Instructions
Crust
- Preheat the oven to 325. In a medium bowl mix graham cracker crumbs, sugar, nutmeg, salt,and melted butter together. This should resemble damp sand.
- Pour your crumb mixture into a 9-inch springform pan and press evenly into the pan. You can use the bottom of a flat glass or a flat measuring cup to really press it in well and get a nice, even crust.
- Bake for 10 minutes. Let cool completely
Cheesecake Filling
- Add the softened cream cheese to the mixing bowl of a stand mixer and beat with a paddle at medium/high speed for about 1 minute. Scrape down the sides and bottom of the bowl and beat for a few seconds more.
- Add the sugar to the cream cheese and mix at medium-low speed until just combined. Scrape the bowl again and slowly add the eggnog until it is combined and the batter is smooth.
- Add eggs and beat on low speed until combined, about 30 seconds-1 minute. Scrape the bowl again.
- Add the nutmeg, vanilla, and rum extract. Beat until just combined. At this point, the batter should be smooth and fairly runny.
- Using 18-inch heavy-duty aluminum foil, wrap the outside of your springform pan with 3-4 sheets of foil.
- Place the wrapped pan in a deep roasting pan. You can alternatively use a baking sheet, so long as the sides are about 2 inches deep. Add the cheesecake batter to the springform pan.
- Using very hot water, add water to the baking sheet until there is about 1 ½ inch of water around the springform pan. On a rack in the lower 3rd of the oven, carefully move your pan into the oven.
- Bake for 1-1 ½ hours. After about an hour of baking, check the cheesecake’s consistency. A slight jiggle of the pan (while still in the oven) should tell you if it’s ready or needs more time. The cheesecake should be jiggly, but not liquid. If it seems very liquid still, give it 15 more minutes and check it again.
- Once the cheesecake is firm, yet jiggly, turn the oven off but leave the cheesecake in the oven for another hour or so, until the oven has cooled down. Resist the temptation to open the oven during this time! The purpose of this step is to allow the cheesecake to cool slowly as the oven cools. Doing this will prevent it from cracking, as one of the biggest reasons cheesecakes crack is the drastic temperature change going from the hot oven into the much cooler kitchen.
- Once the oven and the cheesecake are cooled, remove from the oven and carefully remove the foil lining the pan. Chill in the fridge for at least 6 hours.
- Before serving, run a knife around the edge of the pan to ensure an easy release when the springform is removed. Top with the whipped cream topping and enjoy!
Whipped Cream
- Using a stand mixer with the whisk attachment or a hand mixer, whip the heavy cream, eggnog, nutmeg, and powdered sugar together until medium still peaks form.
- Spread the whipped cream over the top of the cheesecake and dust lightly with ground nutmeg.
Video
Nutrition
Nutrition information is automatically calculated, so should only be used as an approximation.



Can you make this without a springform pan??
I’ would like to use Biscoff cookies instead of graham crackers for the crust. Should I alter any of the other crust ingredients?
Theresa, a Biscoff crust Will be so yummy with this cheesecake!
I suggest you use the crust ingredients and instructions from this recipe in place of the crust ingredients in the eggnog cheesecake recipe. You can still add nutmeg to the crust if you want!
Let me know how it turns out!
Hello,
How many days prior to serving can I make the cake?
Hi Myla, thank you for your question. This cheesecake can be made up to 6 days before serving! The total shelf life is 7 days, so it would have to be totally consumed on the 7th day.
Can you bake this in a 9×13 pan? If so what would be the bake time?
Hi Stacy! You will probably want to 1.5x or 2x the crust, then you don’t need to wrap it in foil because it won’t be a springform pan. Just set it in a larger pan (like a roasting pan) and fill it up with water until halfway up the side of the 9×13. The bake time SHOULD be right around 30-40 minutes, then the cheesecake should sit in the oven with the door closed and the oven off for an hour or so, until the oven cools to room temperature before the cheesecake is removed and chilled in the refrigerator. Keep in mind that I’ve never baked my standard cheesecake recipes in a 9×13, so I’m not 100% sure on the bake time as I haven’t done it myself. I hope this helps! Good luck and let me know how it turns out!
Can you put the cheesecake pan inside another pan without wrapping it and then put that pan inside a bigger pan and pour the water around the bigger pan. Allow the steam to help the cheesecake from cracking. This keeps you from having to wrap the pan and maybe getting water in it.
Hi Willie, thank you for your question. A water bath won’t work the way it’s supposed to unless the water is right up against the cheesecake to help slow the baking of the edges. However, using two pans like you suggested or placing a baking sheet on the rack below with water in it will work decently. Not the best, but they will both work better than having no water at all. I hope this helps. Let me know how it turns out!
Lordy, I just reread my comment and thought oh dear my age is showing. LoL! I used the word tinfoil instead of aluminum foil. But I’m sure you all know what I meant. (:->)
I can’t wait to taste this! It just went in the oven. I wanted to add a suggestion here. First of all, I always line my pan with parchment paper cut to size before I put the crust in.
Secondly, instead of using tinfoil to wrap the pan in, which can leak and let water in, I now use Reynolds large cooking bags to put the pan in before putting it into the water bath. I just trim it so that it is even with the sides of the pan and not hanging over into the batter, it works perfectly!
I made this for my husband at Christmas time and he loved it. He’s picky about his cheesecake and this was by far his favorite. I’m wanting to do something similar for his birthday but a different flavor. I was thinking a salted caramel. Could I replace the egg nog with a homemade caramel sauce? Or do you have a tried and true recipe for a caramel cheesecake that is similar to this one?
you absolutely can! thats how i make mine. and only 4 eggs
What can I do to get a stronger Eggnog flavor?
You could try adding in some eggnog extract to the cheesecake!
I’ll try that next year!
What changes would I need to make if I’m using mini graham cracker crusts? How many would it make?
I haven’t tried that with this recipe but you could try using this recipe for that instead! Mini Cheesecakes
Actually I got 30 mini Keebler graham cracker crust cheesecakes out of this recipe and only took 30 mins to bake. Just to be on the safe side, I put about enough water to go about a quarter inch up the sides of the foil pans.
Please help! I just made this cheesecake and forgot to cook th base before I added the filling!?!? Any suggestions…
Oh no! Unfortunately, if you have already put the filling in, there isn’t anything you can do except start over! I am so sorry!
Would I need to adjust anything if I omit the crust? I need the cheesecake for a project, but without crust. Thank you.
I haven’t tried making this without the crust before. The filling will probably stick to the pan? Let me know how it turns out!
Have you tried this with a chocolate graham cracker crust?
I haven’t but I’m sure it would be delicious!!
put a parchment paper liner on the bottom
My sister and I made this cheesecake yesterday, and had it today. It was so delicious! The homemade whipped cream on top tasted really good on it.