

This website may contain affiliate links and advertising so that we can provide recipes to you. Read my disclosure policy.
These clothespin cookies (also known as cream horns) are like little bites of heaven, filled with creamy goodness that’ll make you forget all your problems – at least until you run out of them. They only take 30 minutes to prepare and are just the soft, creamy pastry you need in your life!
If homemade pastries with a delicious filling are your jam, you’re going to love these clothespin cookies! Then you’ll have to try making homemade eclairs, maritozzi, or cannolis!
 are like little bites of heaven, filled with creamy goodness that'll make you forget all your problems - at least until you run out of them. They only take 30 minutes to prepare and are just the soft, creamy pastry you need in your life!")
What are Clothespin Cookies?
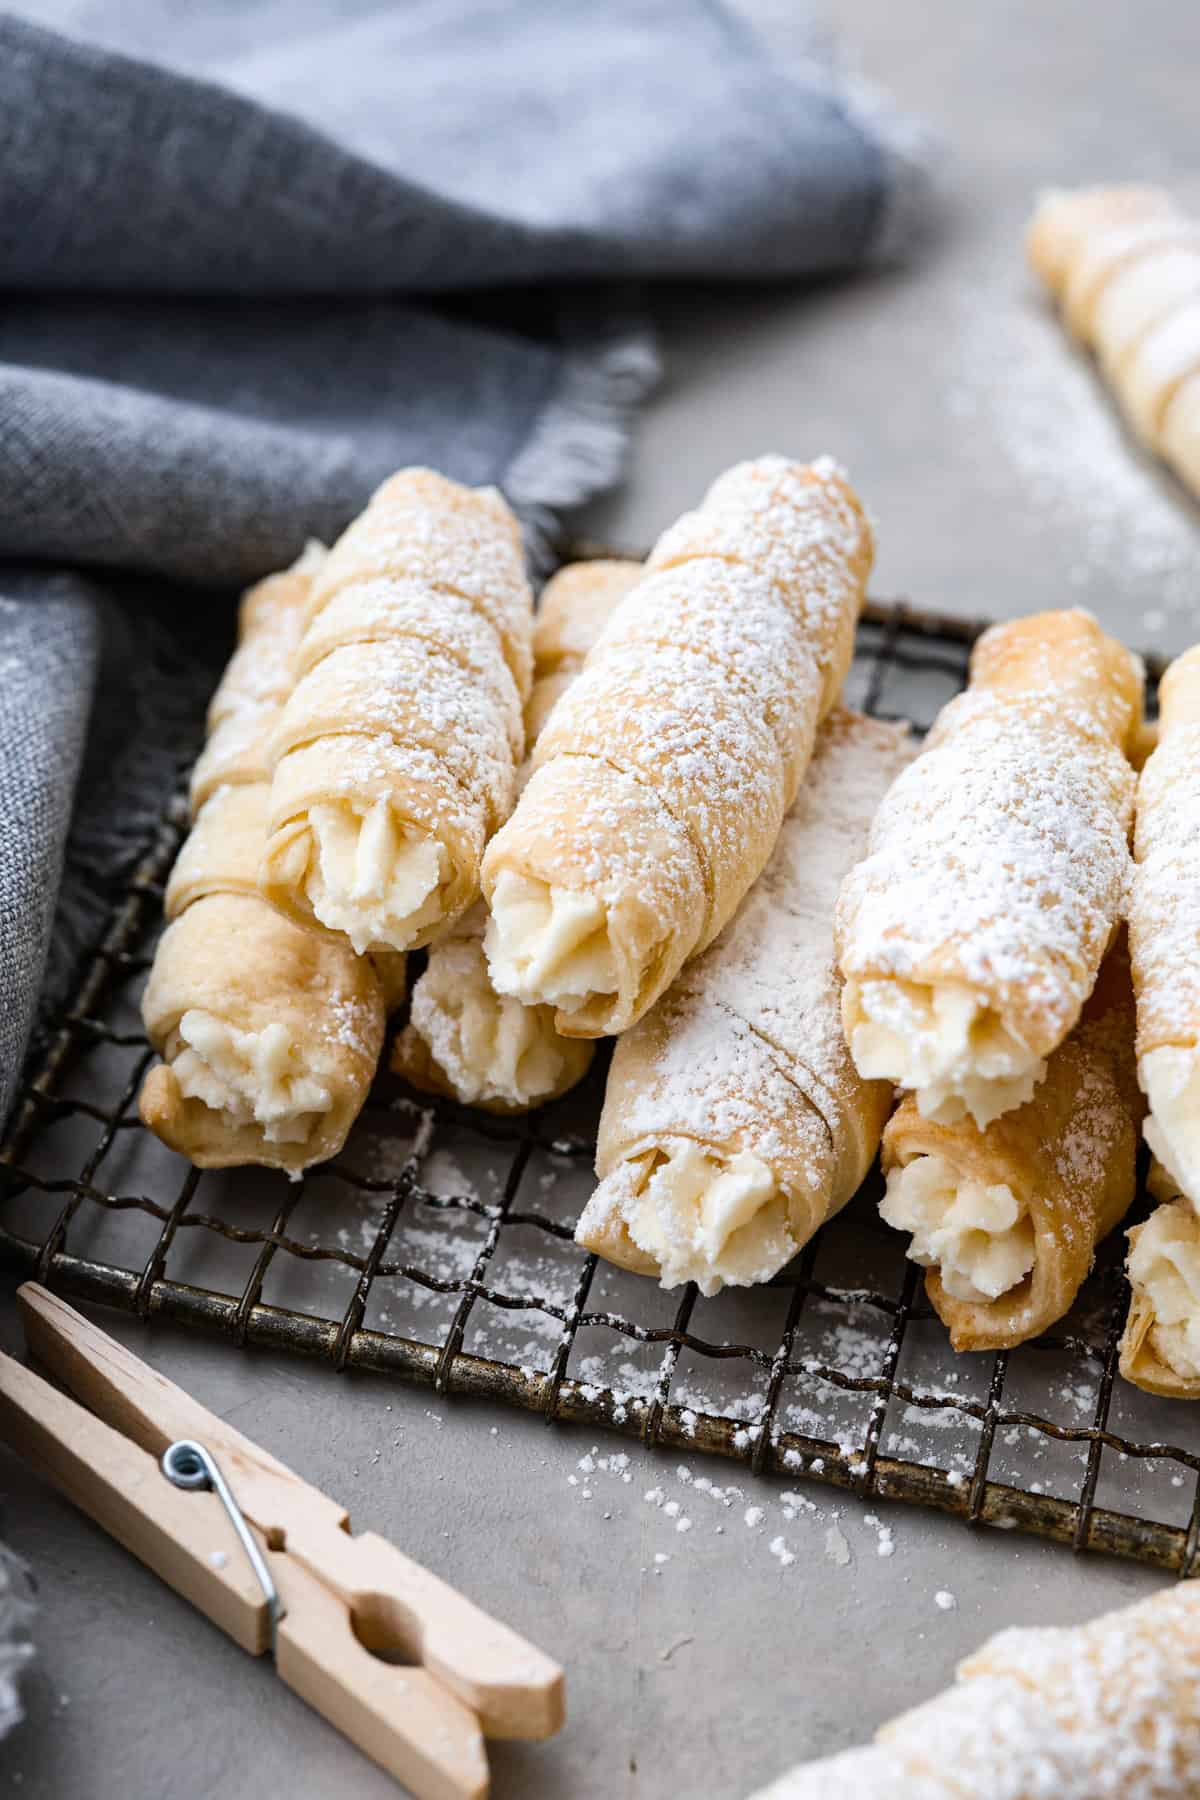
Clothespin cookies, also known as cream horns, are a whimsical pastry that look just like their namesake: a tiny clothespin! These adorable treats are made from flaky, buttery pastry dough wrapped around a sweet, creamy filling. They’re typically dusted with a light sprinkle of powdered sugar, adding just the right touch of sweetness to this already delightful treat!
But let’s talk about the taste! Each bite is filled with the buttery, flaky goodness of the pastry dough. And then there’s the filling – oh, the filling! Drool. I made these clothespin cookies with a vanilla filling, but you can switch up the flavor however you’d like! Whatever the flavor, these cookies are always creamy, sweet, and utterly delicious. They’re perfect for dessert or as a sweet snack to enjoy throughout the day. However you choose to enjoy them, I know you will love them as much as I do!
Ingredients Needed
The best thing about this recipe is that it uses so many simple ingredients! You may be able to make them with things you have in your pantry right now. Check out the recipe card below for exact measurements!
- Unsalted Butter: This is the backbone of the cookie dough. The chilled butter is cut into small pieces and then blended with the other ingredients to create a crumbly, buttery dough. As the dough bakes, the butter melts and creates a flaky texture that is the perfect base for the sweet filling!
- Granulated Sugar: Adds sweetness to the dough and also helps it brown in the oven.
- Egg Yolk: Gives the dough richness and moisture.
- Flour: To give the shells structure. Regular all-purpose flour works just fine!
- Salt: Just a pinch to keep your dough from tasting bland.
- Water: Adjusts the consistency of the dough.
Filling
- Granulated Sugar: To make the filling nice and sweet!
- Flour: Gives the clothespin cookie filling a little bit of structure so it’s easier to pipe into the shells.
- Milk: Makes the filling smooth!
- Unsalted Butter: I used room temperature butter so it mixes together with the other ingredients easily.
- Vanilla Extract: Adds a sweet, floral flavor to the filling.
- Salt: Helps to make the filling extra flavorful!
Clothespin Cookie Recipe
I know it may look like a lot of instructions, but these cream horn cookies are so easy to make! Keep in mind that the shells need a couple hours to chill, so these cookies aren’t the best to make last minute. But trust the process, it’s so worth it!
Cookies
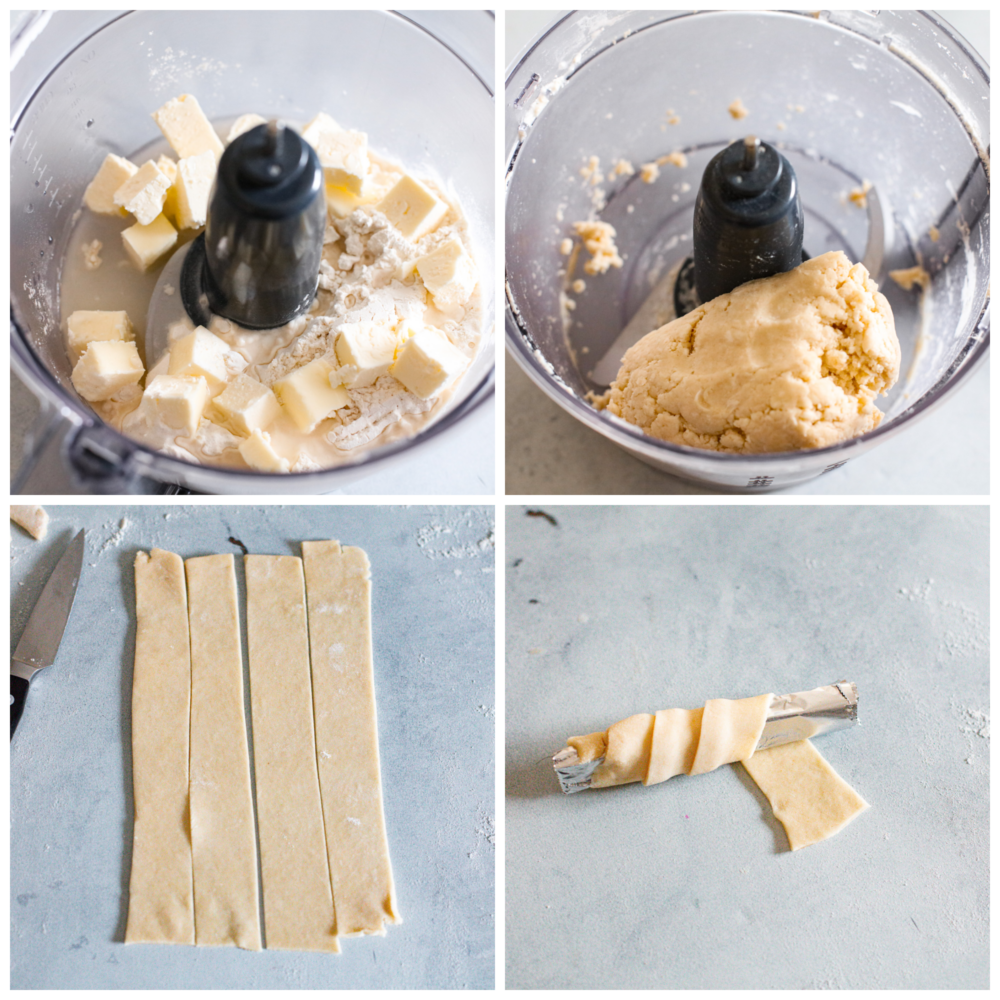
- Combine Ingredients: Add the butter, sugar, egg yolk, flour and salt to a food processor. Pulse together. Add the water and pulse until the dough comes together into a ball.
- Transfer to Floured Surface: Remove to a floured surface and press together until only lightly tacky, not sticky. Cut into two and wrap both halves in plastic wrap.
- Chill: Chill in the fridge for 1-2 hours.
- Preheat Oven, Prep Cookies: Once the dough is nearly done chilling, preheat the oven to 375 degrees Fahrenheit. Wrap the clothespins in small sheets of foil.
- Roll Out Dough: Using one half at a time, roll out the dough on a lightly floured surface. Roll it into a rectangle that is about 12×8 inches. Trim the edges with a sharp knife to make them straight.
- Cut: Cut into 1-inch strips.
- Shape: Wrap each strip of dough around a prepared clothespin, ensuring the dough overlaps about ¼ inch. Place on a parchment lined baking sheet with the ends of the strip of dough facing down. Repeat with the second half of the dough.
- Bake: Bake for 18-20 minutes, until lightly browned.
- Cool: Let the cookies cool for 2-3 minutes before gently removing the clothespins. Let them cool the rest of the way on a cooling rack.
Filling
- Flour Mixture: Add the flour, sugar and milk to a pan. Cook over medium heat while constantly whisking until thick like pudding, about 10 minutes.
- Transfer to Bowl, Chill: Remove from the heat and add to a heat-proof bowl or quarter sheet pan. Cover with plastic wrap so the plastic touches the top of the mixture and prevents a film from forming. Chill in the fridge for 40 minutes.
- Butter Mixture: Add the room temperature butter to a stand mixer and whip with the whisk attachment for about 8 minutes, until the butter is light and fluffy.
- Combine: Add the flour mixture to the butter one scoop at a time until it is all incorporated.
- Add Vanilla: Scrape down the sides and bottom of the bowl and switch to the paddle attachment. Add the vanilla and salt and beat on medium-high for 10-13 minutes, until smooth and fluffy.
- Fill Cookies: Use a piping bag fitted with a star tip to pipe the filling into the cooled clothespin cookie shells.
Tips and Tricks
These little cream-filled cookies are a dream. They’re surprisingly easy to make and sure to impress wherever they go! To make sure your cream horn cookies turn out perfectly, here are a few more tips to keep in mind.
- Premade Dough: To cut down on prep time, you can use premade pastry dough!
- Chill First: Make sure to chill your dough before rolling it out to prevent it from becoming too sticky.
- Add Egg Wash: Brush the dough with a beaten egg before baking to give it a shiny golden-brown finish.
- Chill First: Let the baked cream horns cool completely before filling them with cream. This will help them hold their shape.
- Toppings: Dust your clothespin cookies with powdered sugar or drizzle them with chocolate or caramel sauce for a decorative finishing touch.
 are like little bites of heaven, filled with creamy goodness that'll make you forget all your problems - at least until you run out of them. They only take 30 minutes to prepare and are just the soft, creamy pastry you need in your life!")
How Long Do Clothespin Cookies Last?
Before being filled, leftover cookies may be stored in an airtight container in the fridge for up to 3 days. I recommend adding paper towels to the container to help cushion the shells so they don’t crumble.
- Filled Cookies: Leftover filled cookies can be stored in an airtight container for about a day before getting soft.
- Freezing Dough: Unbaked dough can be wrapped in two layers of plastic wrap and then placed in a ziplock bag and frozen for up to 3 months. Allow to thaw in the fridge overnight before rolling out.
 are like little bites of heaven, filled with creamy goodness that'll make you forget all your problems - at least until you run out of them. They only take 30 minutes to prepare and are just the soft, creamy pastry you need in your life!")
More Amazing Desserts to Try
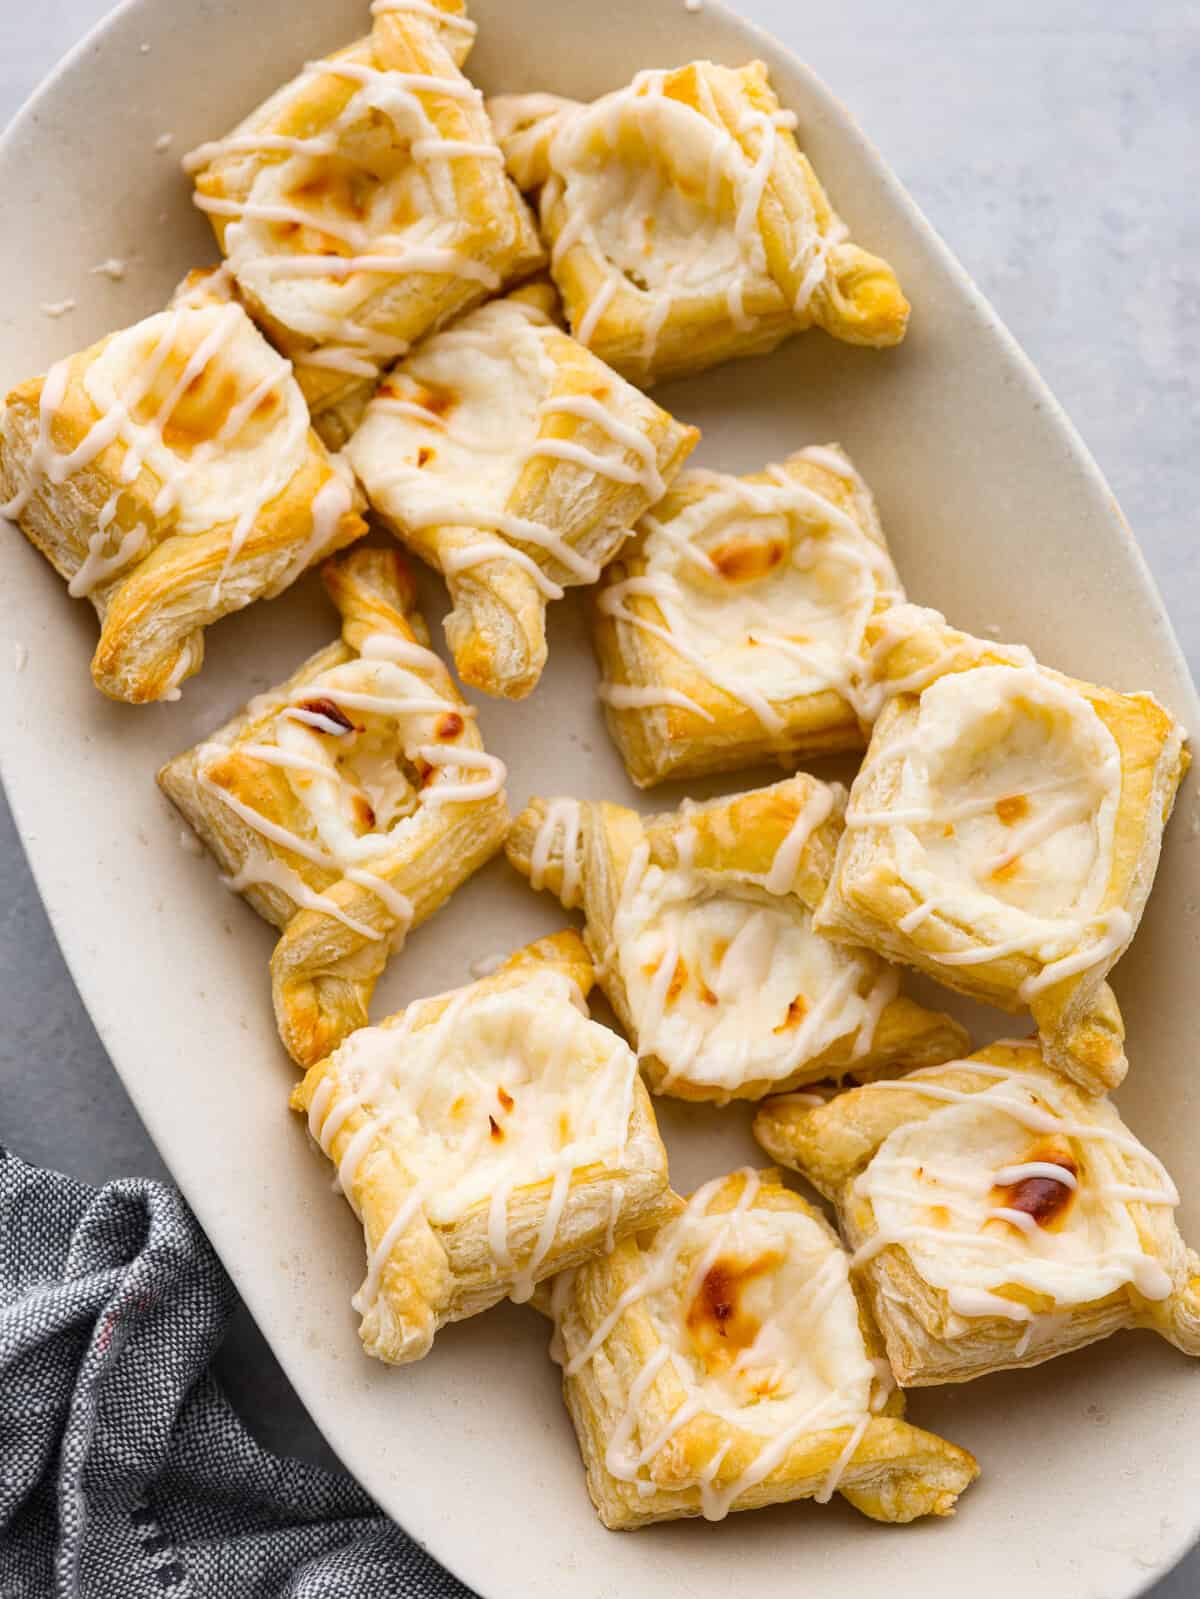
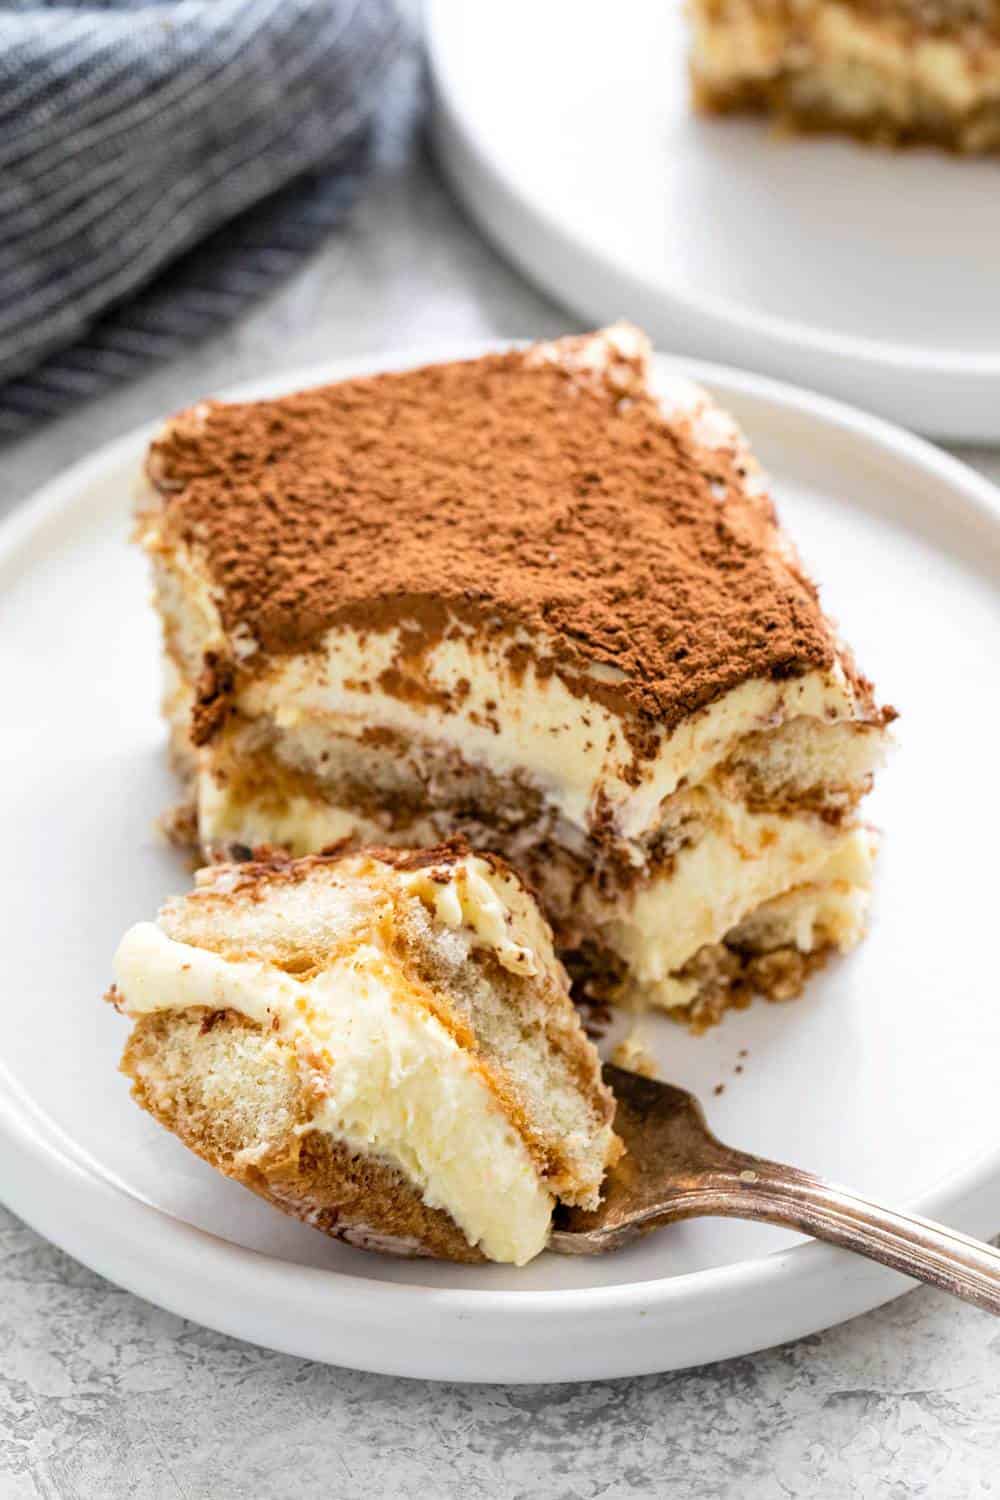
If creamy, delicate desserts are your thing, here are a few more must-try recipes! Whether you’re wanting a foolproof cheese danish recipe, eclairs, or tiramisu, here are a few recipes similar to clothespin cookies that I know you’ll love. They are the perfect way to satisfy any sweet tooth.
Pin this now to find it later
Pin It
Clothespin Cookies
Ingredients
- ½ cup unsalted butter chilled
- 2 teaspoons granulated sugar
- 1 egg yolk
- 1 ¼ cup all purpose flour
- 1 dash salt
- 5 tablespoons water
Filling
- ¾ cup granulated sugar
- ¼ cup flour
- 1 cup milk
- 1 cup unsalted butter room temperature
- 1 teaspoon vanilla extract
- 1 dash salt
Instructions
Cookies
- Add the butter, sugar, egg yolk, flour and salt to a food processor. Pulse together. Add the water and pulse until the dough comes together into a ball.
- Remove to a floured surface and press together until only lightly tacky, not sticky. Cut into two and wrap both halves in plastic wrap.
- Chill in the fridge for 1-2 hours.
- Once the dough is nearly done chilling, preheat the oven to 375 degrees Fahrenheit. Wrap the clothespins in small sheets of foil.
- Using one half at a time, roll out the dough on a lightly floured surface. Roll it into a rectangle that is about 12×8 inches. Trim the edges with a sharp knife to make them straight. Cut into 1-inch strips.
- Wrap each strip of dough around a prepared clothespin, ensuring the dough overlaps about ¼ inch. Place on a parchment lined baking sheet with the ends of the strip of dough facing down. Repeat with the second half of the dough.
- Bake for 18-20 minutes, until lightly browned.
- Let the cookies cool for 2-3 minutes before gently removing the clothespins. Let them cool the rest of the way on a cooling rack.
Filling
- Add the flour, sugar and milk to a pan. Cook over medium heat while whisking constantly until thick like pudding, about 10 minutes.
- Remove from the heat and add to a heat-proof bowl or quarter sheet pan. Cover with plastic wrap so the plastic touches the top of the mixture and prevents a film from forming. Chill in the fridge for 40 minutes
- Add the room temperature butter to a stand mixer and whip with the whisk attachment for about 8 minutes, until the butter is light and fluffy.
- Add the flour mixture to the butter one scoop at a time until it is all incorporated
- Scrape down the sides and bottom of the bowl and switch to the paddle attachment. Add the vanilla and salt and beat on medium-high for 10-13 minutes, until smooth and fluffy.
- Use a piping bag fitted with a star tip to pipe the filling into the cooled shells.
Video
Nutrition
Nutrition information is automatically calculated, so should only be used as an approximation.


I do not have clothespins, can I use cannoli tubes? I get the idea. Sounds great.
YES, you can use cannoli tubes! Since cannoli tubes are usually larger than clothes pins, have a hole in the middle allowing airflow. And since they’re made of metal, I would check the cookies around the 13 minute mark and keep an eye on them from there, since they will most likely bake faster. I haven’t tried it with the cannoli tubes, so I can’t say exactly how long for the bake time with those factors. Let me know how they turn out!
To avoid the shape of the clothes pin where you need to becareful so you can pull it out without it breaking. I bought 3 wooded dowels and cut them into 7 inch pieces, was so much easier to just slide them out.
Using a dowel is a great idea! Thanks for the tip!
Please re-read your instructions for step 1 of the filling recipe for Clothes Pin Cookies. It mentions Cool, but never tells you to first heat the ingredients.
Good catch! That should be cook, not cool.
Those Clothespin Cookies Look Pretty AWESOME!!! They Look Like Connellis & Filled With Cream & Most Definitely Must Try To Make Those At Home!!! They Look Absolutely Delicious To Eat For Dessert After Dinner!!! Always Good To Try A New Cookies That Alyssa Makes!!! So So Many Cookies In This World ? Today!!! These Clothes Pin ? Cookies Looks Absolutely Delicious & Delicious Need To Try Alyssa `s Clothespin Cookies!!! Thank.You Alyssa For Your Recent Recipes They Look Delicious & All Dinner & Dessert Recipes Are Absolutely Awesome From You!!! Happy New Year To You & Your Family Of 2024 & 2023 Went By Way To Fast This Past Year!!! Never Ever HadOr Made Clothespin Cookies & Look Absolutely Awesome & Delicious!!! Happy New Year To You Alyssa & Your Family!!! Thank.You Again For Your Emails ? & Your Awesome Awesome Recipes From You!!! Have A Great Day Today & Great New Year `s Week This Week!!! Most Definitely Save Clothespin Cookies Recipe From You!!! Thank.You Again Alyssa Your Absolutely Awesome At Your Cooking Recipes!!! Charlie Andrew
These were fun. Just the kind of fussy treats I like to make during the holidays. Next time I will add a bit of vanilla to the cookies and less water. They were kind of bland. I would also offer a bit of advice. Don’t wrap the dough tightly around the pins and stay away from the ends so they come off easily. The filling was yummy after a good chill before filling. I will make these again!
Your instructions say “Wrap around a ‘prepared’ clothespin” but you don’t mention how the clothespin is prepared.
I thought I read that the clothes pins are wrapped in aluminum foil
For the dough … can sub the made from scratch with refrigerated pastry dough?