

This website may contain affiliate links and advertising so that we can provide recipes to you. Read my disclosure policy.
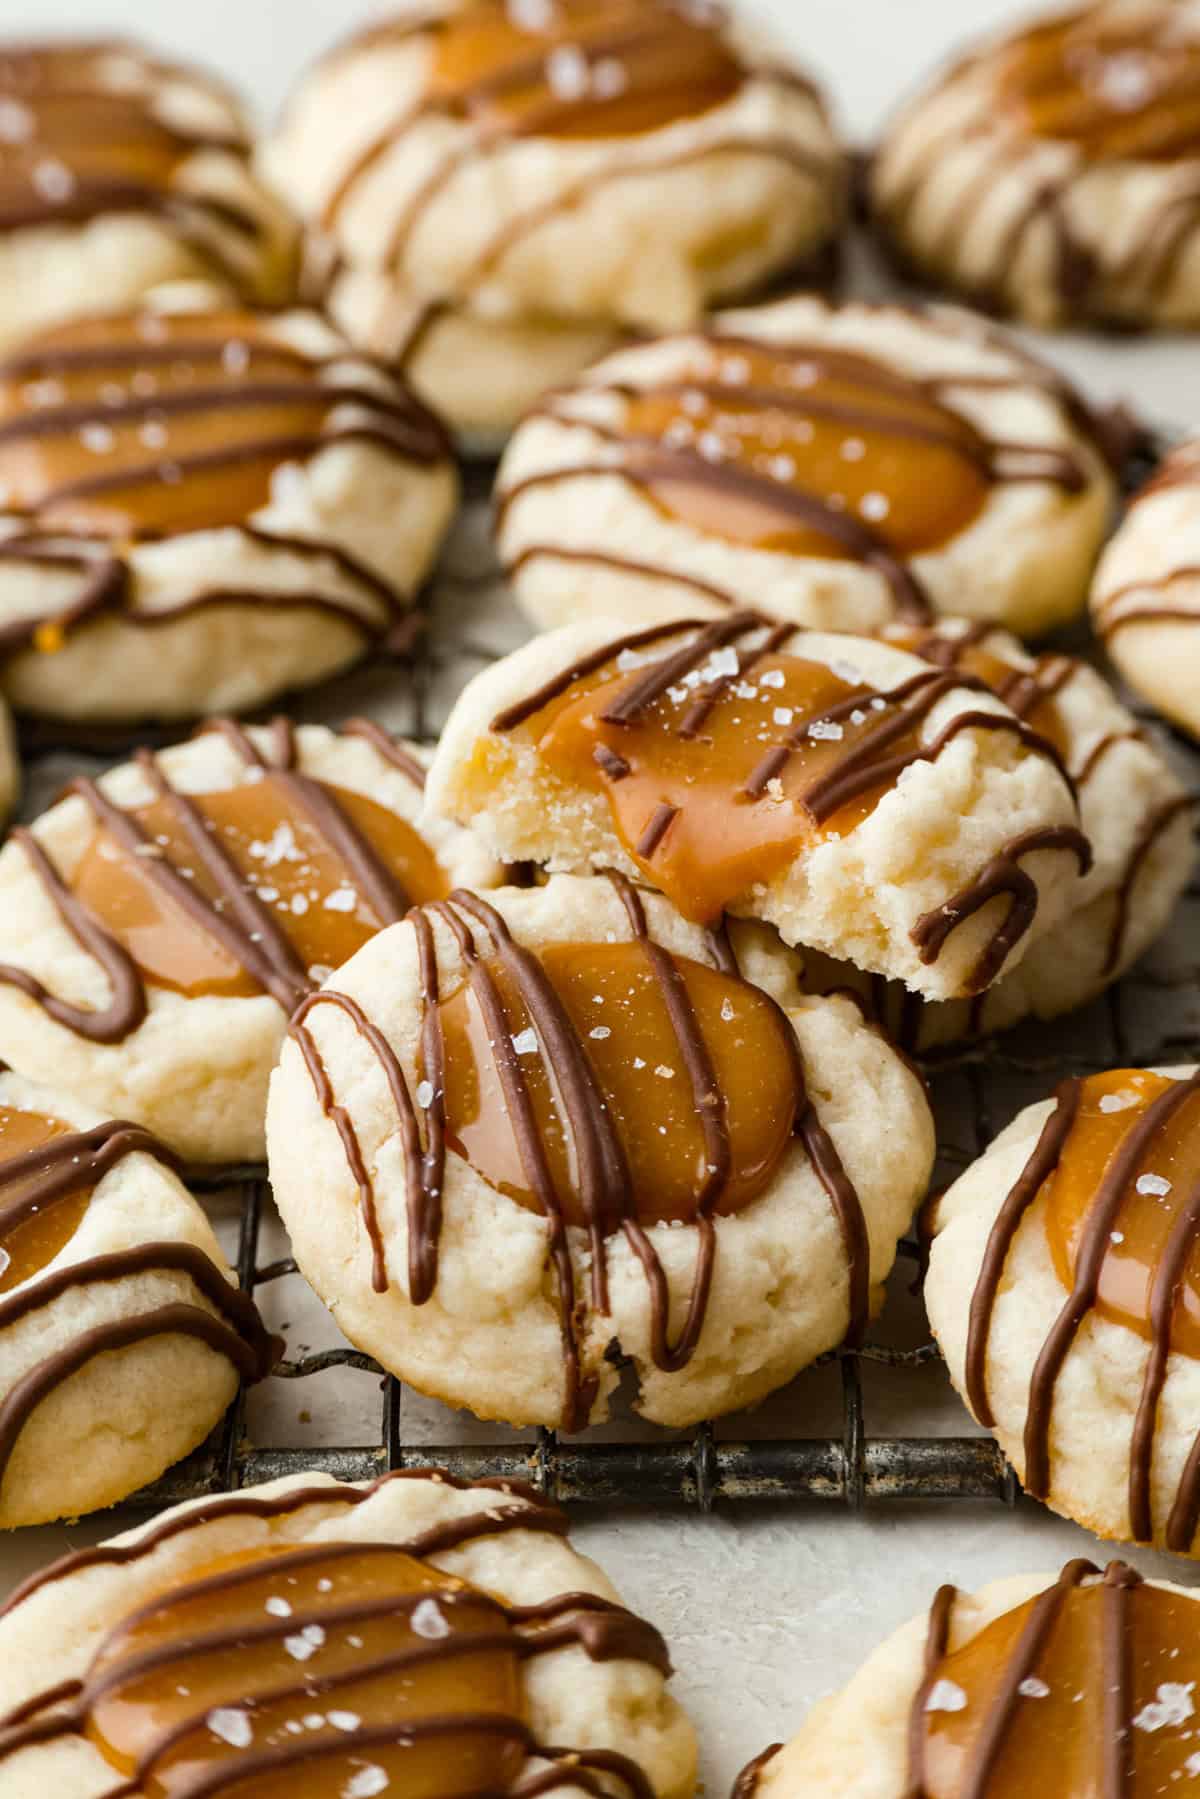
Meet my upgraded Twix thumbprint cookies! I re‑tested and updated the recipe so you’ll get defined wells, clean edges, and a tender center every time! They are perfect for gift giving and cookie parties!

Why These Are Better Than The Real Deal
- Cookie Perfection: I discovered that chilling the cookies after scooping and indenting helps them hold their shape better!
- Silky caramel, Smooth Chocolate: If you use soft caramels and real melting chocolate (skip chips), you’ll get a smoother, silkier finish!
- Gifting & Parties: These cookies are show stoppers! They are great for cookie exchanges, neighbor gifts, or just a treat for yourself and your family.
A Reader’s Review
Love these! We make them every year and they go fast!
– Kellie
Twix Thumbprint Cookies Ingredients

- Chocolate: Skip chocolate chips; instead, use good quality chocolate bars, baking chocolate, candy coating chocolate, or chocolate melting wafers.
- Caramels: Use soft caramel candies like Werther’s or Kraft. You’ll need about 130g.
- Sea salt: Sprinkle flake sea salt right after drizzling the chocolate for that salty pop.
- Dairy‑free: If you need these to be dairy-free, you can use butter-flavored shortening and swap the cream for coconut or almond milk.
How to Make Twix Thumbprint Cookies
Holy cow, these taste like a Twix in cookie form! I’m not admitting how many I “tested” before rushing a plate to the neighbors, but fair warning, they disappear fast! Here’s how to make them.
Make Cookies
- Combine Butter & Sugar: Add unsalted butter and granulated sugar to a large bowl. Beat on medium-high speed with a hand mixer or a stand mixer fitted with the paddle attachment. Mix for 2-3 minutes, until light and fluffy.
- Add Egg & Vanilla: Add egg and vanilla extract, then mix again until fully combined. Scrape down the sides and bottom of the bowl as needed.
- Add Dry Ingredients: Add flour and salt, and beat on low speed until fully combined and all the flour has been absorbed.
- Scoop & Indent: Use a small cookie scoop to portion dough onto parchment‑lined baking sheets. Indent each ball of dough with the back of a 1‑teaspoon measuring spoon, then chill 30–60 minutes.
- Bake: Preheat the oven to 375°F during the last 15 minutes of chilling. Arrange dough 2 inches apart on parchment-lined sheets. Bake 8–10 minutes, until the centers are matte but slightly soft. Re‑indent each cookie right out of the oven. Cool for 2 minutes on the sheet before moving to a cooling rack.
- Melt Caramel: Meanwhile, heat the caramel candies and heavy cream in the microwave. Do it in 15-20-second increments, stirring between each increment until fully melted and smooth.


Caramel Topping & Chocolate Drizzle
- Add Caramel: Spoon ~½ tsp caramel into each indent. If your caramel starts hardening, just warm it up in the microwave. Freeze for 5 minutes before adding the chocolate, so the caramel firms up.
- Melt & Drizzle Chocolate: Microwave the chocolate in 30‑second bursts, stirring until smooth. Transfer to a Ziploc bag, snip a corner, and drizzle over Twix thumbprint cookies. Sprinkle with coarse salt, if desired, and let set.


Alyssa’s Pro Tips
- Chill: Chilling the dough until firm, after you’ve made the indent, allows the butter to set and helps the cookies keep their shape.
Pin this now to find it later
Pin It
Twix Thumbprint Cookies
All the flavors of a Twix bar, buttery shortbread, chewy caramel, and smooth chocolate that come together in one irresistible, easy cookie.
Ingredients
- 1 cup softened unsalted butter
- ⅔ cup granulated sugar
- 1 large egg
- 1 tablespoon vanilla extract
- 2 cups all-purpose flour
- ½ teaspoon salt
- 24 soft caramel candies about 130 grams
- 2 tablespoons heavy cream
- 4 ounces milk chocolate melting chocolate or chopped baking chocolate
Instructions
- Add 1 cup softened unsalted butter and ⅔ cup granulated sugar to a large bowl and beat on medium-high speed with a hand mixer or a stand mixer fitted with the paddle attachment for 2-3 minutes, until light and fluffy.
- Add 1 large egg and 1 tablespoon vanilla extract and mix again until fully combined, scraping down the sides and bottom of the bowl as needed.
- Add 2 cups all-purpose flour and ½ teaspoon salt and beat at low speed until fully combined and all the flour has been absorbed.
- Use a small cookie scoop to portion the dough into balls and lay them out on one or two parchment-lined baking sheets. Use the back of a 1-teaspoon measuring spoon to press an indent into the center of each ball. Place the baking sheets in the refrigerator to chill for 30 minutes to 1 hour.
- About 15 minutes before the dough is finished chilling, preheat the oven to 375 degrees Fahrenheit.
- Arrange the chilled dough on parchment-lined baking sheets so there is 2 inches between each cookie, then bake for 8-10 minutes, until the centers of the cookies still look slightly underbaked, but have lost their sheen and turned matte.
- Remove the cookies from the oven and immediately use the same 1-teaspoon measuring spoon to reform the indent in the top of the cookie since it will puff up while the cookies bake. Let the cookies cool on the baking sheet for 2 minutes before transferring them to a cooling rack to finish cooling.
- Meanwhile, heat 24 soft caramel candies and 2 tablespoons heavy cream in the microwave in 15-20 second increments, stirring between each increment until they are fully melted and smooth.
- Use a teaspoon to fill the indentation in each cookie with caramel, about ½ teaspoon or so. Warm the caramel for 5-10 seconds in the microwave as needed to keep it liquid enough to spoon into the cookies.
- Melt 4 ounces milk chocolate melting chocolate in the microwave in 30-second increments, until fully melted and smooth, stirring between each increment. Add the melted chocolate to a small ziplock bag, then barely snip the corner of the bag off, and quickly drizzle the chocolate over the tops of the cookies. Sprinkle with coarse salt, if desired, and let them sit until the caramel and chocolate is fully set.
Video
Notes
Storage Instructions
- Storage: Airtight at room temp for up to 5 days; use parchment between stacked cookies.
- Freezing: Best Method: freeze unbaked (scooped + indented) up to 3 months; bake from frozen, adding 30–60 sec if needed. Or freeze baked, filled, drizzled cookies in layers with parchment up to 3 months; thaw 1–2 hours (caramel may weep).
Nutrition
Calories: 198kcalCarbohydrates: 24gProtein: 2gFat: 11gSaturated Fat: 6gPolyunsaturated Fat: 1gMonounsaturated Fat: 3gTrans Fat: 0.3gCholesterol: 30mgSodium: 78mgPotassium: 54mgFiber: 1gSugar: 15gVitamin A: 270IUVitamin C: 0.05mgCalcium: 21mgIron: 1mg
Nutrition information is automatically calculated, so should only be used as an approximation.
Tried this recipe?Mention @alyssa_therecipecritic or tag #therecipecritic!


I love making these around the holidays. I was wondering if I could make the dough ahead of time and freeze it?
Hi Melissa, the best method is to freeze unbaked dough, scooped & indented. These will last up to 3 months. To bake from frozen, add 30–60 sec if needed. You can also freeze the baked, filled, drizzled cookies in layers with parchment. They will also last up to 3 months. When you are ready to eat, let them thaw 1–2 hours. Just be warned, the caramel may weep.
Love these! We make them every year and they go fast!
I’ve made these several times. Always a hit, but I put a little touch of my own. I added kosher salt and chopped pecans.
Thank you Alyssa for your quick reply. I’m making these next week.
I’m confused. When do I put the caramel in the indention? Before the cookies bake or after?
Step 2 of the instructions says to “Make indentation in center of each cookie with thumb or end of wooden spoon handle. Bake 7-10 minutes.
In the instructions to make the caramel filling, the instructions say to “Using a teaspoon fill each indentation with the caramel.” The caramel filling instructions are AFTER the baking instructions. This indicates to me that the caramel is put on the cookies AFTER they have baked.
However, a reviewer, Jerri Boone on Dec. 7, 2020, asked a similar question and you replied that the caramel is put on the cookies BEFORE baking.
If the caramel is put on the cookies before baking you might consider rewriting the instructions to clarify that.
Thank you
Sorry for the confusion! The cookies are made as written. Cooked before adding in the caramel.
I used the good butter, Kerrygold….if you do you may have to refrigerate once formed before baking…it will help keep their shape. They are just delious!! Doubled this year
do you put the caramel on before you bake or after?
Has anyone tried using almond flour with these? Would love to hear results.
can I double this recipe?
Yes, of course! Enjoy your Twix cookies! They are addicting!
Can i use semi sweet chocolate chips instead of milk chocolate?
Of course!
I’ve made these as the recipe calls for before and loved them so much, but now I’m no longer able to tolerate dairy. Would using coconut or almond milk as a dairy free substitution work in the caramel filling?
Yes, that is a great substitute! Thanks for asking! XOXO
How long do these store for please and Is the fridge best thanks
They store best in a refrigerator for 2 to 3 days. You can freeze them longer or put them in a plastic container for about 1-2 days. Enjoy! XOXO
This was such a success. I tried it for my work Christmas cookie exchange and it was such a hit. I’m definitely going to make some more this Christmas season! Thanks Alyssa!
Just an FYI..at the beginning of the recipie where it says to preheat oven to 375°. Wait until AFTER you have refrigerated the dough and are prepping them for the oven that you turn your oven on or else you have just wasted a bunch of electricity.