

This website may contain affiliate links and advertising so that we can provide recipes to you. Read my disclosure policy.
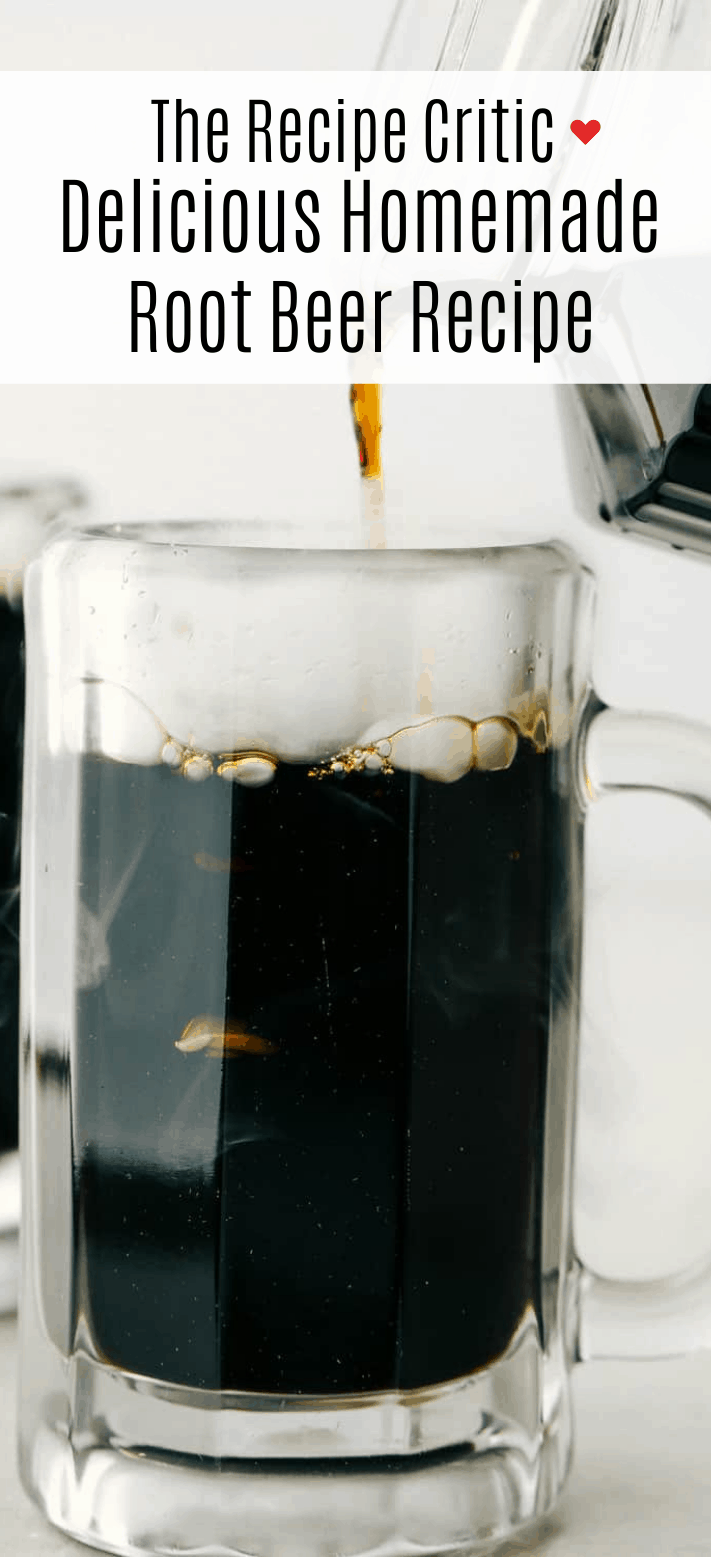
This Homemade Root Beer is a fun, sweet, refreshing treat to make any occasion extra special. It takes just 4 ingredients to create a little magic and a whole lot of tasty fun! I have two ways to make this luscious drink!
I love to serve this at Halloween time, the dry ice gives it such a spooky flare. But serve this with Philly Cheesesteak Sliders, Homemade Sweet Potato Fries and Perfect Apple Pie for an all American dinner.

The Best Homemade Root Beer
Who knew you could make your own Root Beer and that it could be so fun. Family and friends will gather quickly around to see what all the fog is about. It’s fun and exciting and brings an extra special flare to any occasion. It’s rather simple to make and tastes fantastic. The hardest part will be the wait!
If you can’t find Dry Ice I’ve included a non dry ice variation. It does take up to 4 days to make however, so plan ahead. Feel free to double the batch for a huge party. I promise it won’t go to waste. it’s just too good and just that much fun!
Old Fashioned Homemade Root Beer Ingredients
Dry ice is so fun to use in this recipe, it creates the bubbly and a little bit of atmosphere too. Serve up this refreshing beverage everyone will enjoy at any event!
- Cold Water: Even room temp water is ok, as you’ll see in my tips below
- Sugar: Adds the needed sweetness
- Root Beer Extract: Flavor and color make this even better. I used Hires Big H Root Beef Extract for this recipe.
- Dry Ice: Dry ice provides the fun and bubbles
How to Make Root Beer from Scratch
- Mix: In a large container mix the cold water and sugar and stir till dissolved. Add the Root Beer Extract.
- Dry Ice: Add the dry ice and stir frequently to prevent the ice from clumping. Serve once Dry Ice is dissolved.

Making Yeast Carbonated Root Beer
Don’t have Dry Ice locally? Try this method. It takes time but has excellent results.
- Mix: Add Sugar and the Root Beer Extract to 11 cups of warm water.
- Yeast: Add one Tablespoon of yeast to a separate cup of warm water and stir.
- Stir: Stir the yeast mixture with the sugar mixture.
- Pour: Place into clean bottles leaving an inch of space. Let them sit at room temp for four days.
- Fridge: After four days place them in the fridge till ready to use.

Root Beer Extract Vs Root Beer Concentrate
Just so you aren’t surprised by your flavor or lack of, double check what you buy. Either will work for your Homemade Root beer, but they are different.
- Root Beer Extract (What this recipe calls for) Extract has a milder flavor so you need more to get that flavor. You can always add extra if you feel it needs it too.
- Root Beer Concentrate: If this is what you have make note is much stronger than extract so you’ll need less. For this recipe you would need only 3 teaspoons of concentrate for 12 cups of water.

Dry Ice 101
When making Homemade Root Beer, dry ice is a must. It creates that smokey exciting atmosphere and bubbles. There are a few things to remember when working with it however.
- Where to find: To save yourself trouble and frustration, call your local stores to see if they carry it. You’ll be surprised that many do. Warehouse stores such as Sam’s Club and Costco often carry it as well as Walmart and Krogers if you have them in your area.
- Storing: Dry ice evaporates quickly. Do not buy days before you need it. Buy it the day you plan on making your Root Beer.
Keeping it: Never completely cover a container with dry ice. For this reason don’t keep it in a shut freezer either. Place in a cooler or styrofoam cooler with a towel over it. Keep it as cool as possible to help it last longer. - Break it: If it needs to be broken up, place in a brown paper bag and hit it with a hammer or mallet outside.
- Burns: Never touch dry ice with your bare hands and keep it away from children. It can cause severe burns immediately. Wear gloves and use tongs when handling.
- Inhale: Do not inhale the smoke from dry ice, in fact this should be made in a well ventilated area or outside so the carbon dioxide doesn’t build up.
- Drink: Never drink or swallow dry ice. Wait till the ice has melted before drinking or ladel out only the rootbeer without the ice.
- Fog: To get the best fog for your homemade root beer use in tepid temperature water.
- Carbonation: Dry ice will actually not add a ton of carbonation. If you want more use sparkling or soda water for best results for perfect Homemade Root beer.

More Luscious Drink Recipes to Try
Drink it up!
- Homemade Pumpkin Spice “Latte”
- Thin Mint Milkshake
- Chick fil A Copycat Frosted Lemonade
- Frozen Yogurt Bark
- Best Ever Horchata
Pin this now to find it later
Pin It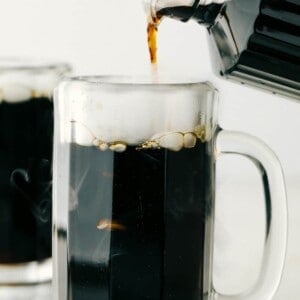
Homemade Root Beer
Ingredients
- 12 cups cold water
- 2 ½ cups granulated sugar
- 2 tablespoons root beer extract
- 3 pounds broken dry ice
Instructions
- Add 12 cups cold water, 2 ½ cups granulated sugar, and 2 tablespoons root beer extract to a large container or drink dispenser. Stir until the sugar dissolves.
- Add 3 pounds broken dry ice to the root beer mixture, stirring frequently to prevent the dry ice from clumping.
- Continue to stir until the dry ice has dissolved. Serve chilled.
Notes
Nutrition
Nutrition information is automatically calculated, so should only be used as an approximation.


Alyssa, just a heads up on your root beer recipe. It contains a typo.
In the Root Beer recipe, under Dry Ice 101, you state, ” Inhale: Do not inhale the smoke from dry ice, in fact this should be made in a well ventilated area or outside so the carbon monoxide doesn’t build up.
Actually, the gas off from the dry ice is carbon dioxide. (CO2)
Although considered a greenhouse gas, trees and plants love it.
All mammals exhale it with each breath.
Carbon monoxide gases (CO) on the other hand, are from fumes of vehicles, small engines stoves, fireplaces and furnaces, etc. Carbon monoxide poisoning can cause serious bodily harm or even death.
Just trying to help out and thought you might want to correct that.
Hi Ron, thank you for pointing that out. I will get it fixed. Although you still do not want to breath concentrated CO2. I still need to leave my warning. This is what google said about why inhaling concentrated CO2 is bad, “Inhaling concentrated carbon dioxide is dangerous because it displaces oxygen in the air, leading to oxygen deprivation which can cause headaches, dizziness, confusion, rapid breathing, and in extreme cases, unconsciousness and death due to asphyxiation. Essentially, the high CO2 concentration prevents your body from getting enough oxygen to function properly.”
If you are making it with yeast do you cork or seal the bottle?
Yes. I would let the yeast proof for about 10-15 minutes. Then, once you put them in a bottle, seal it up for at least 24 hours.
I’m wanting to make your recipe for a graduation bbq that we’re having in a few days. I’m using a 5 gallon beverage cooler (the kind with a spigot), though I’m only planning to make a 2 gallon batch. Can you please tell me how to adjust the measurements for your recipe, for a 2 gallon batch? Of course I could find a different recipe, but I’d prefer 5o stuck with yours, if I can get the right measurements worked out. Thanks! Oh & I’ll be sure to return & give this recipe a rating, afterwards!
You are so nice! Thank you so much for using my recipe. You will have to triple the recipe for the 5 gallon bucket and possibly even 4 times it if you do not use the dry ice.
Can the syrup be made, then get unflavored carbonated water and mix the 2 for that bubbly experience?