
This website may contain affiliate links and advertising so that we can provide recipes to you. Read my disclosure policy.
Flourless Chocolate Cake is an insanely rich and delicious chocolate dessert. Similar to the inside of a truffle, this gluten-free dessert will satisfy your sweet tooth with ease!
Looking for more great flourless desserts? Try these flourless brownies, chocolate cookies, or peanut butter cookies! These gluten-free treats are all so delicious and have the most delicious, tender texture.

The Best Flourless Chocolate Cake
If a rich, decadent dessert is what you’re looking for, look no further. Homemade flourless chocolate cake might seem a bit intimidating to make at first, but it’s really quite easy. Plus, you can’t ask for a more decadent, rich, and drool-worthy recipe that is sure to impress anyone!
And the good news is, it’s gluten-free, so it works for groups that have different dietary restrictions! You won’t even miss the flour with how moist and amazing this cake is. It’s so fudgy and tender, seriously like the inside of a chocolate truffle. What dessert dreams are made of!
What is Flourless Chocolate Cake Made Of?
There are lots of different recipes out there for flourless chocolate cake, but the main ingredients in this recipe are sugar, chocolate, butter and eggs. The large quantity of eggs are what allow this dessert to take on the form of a cake without the addition of flour.
- Granulated Sugar: To make the cake nice and sweet!
- Strong Coffee: Even if you don’t like coffee, a hint of strong coffee with rich chocolate really enhances the overall flavor.
- Salt: Just a little bit to make the whole cake taste better!
- Chocolate Chips: I recommend using semi-sweet, bittersweet, or dark chocolate chips since sugar is added separately.
- Butter: I used unsalted butter to add a boost of richness to the flourless chocolate cake.
- Vanilla: Okay, nothing earth shattering there. I think pretty much every dessert recipe deserves vanilla, but I also consider it a necessary ingredient in flourless chocolate cake. Use pure vanilla extract for the best flavor!
- Large Eggs: Give the cake its structure.
Flourless Chocolate Cake Recipe
Similar to a cheesecake, this flourless chocolate cake uses a water bath to set up properly. But trust me, it’s not as tricky to get right! Follow these instructions to end up with the most rich, chocolatey, gluten-free dessert ever.
Preparing the Cake Batter and Water Bath
- Preheat Oven, Prepare Pans: Preheat oven to 300 degrees F. Line the bottom of a 9-inch spring form pan with parchment paper. Spray the inside of the pan and top of the parchment paper with cooking spray. Wrap the bottom of the spring form pan with heavy duty aluminum foil. Separately, fill a large casserole dish (I used 11×13 inch) or baking sheet with about 1/2 inch of water to form a water bath.
- Coffee Mixture: In a small saucepan over medium heat, combine sugar, coffee and salt. Stir well and heat just until the sugar and salt have fully dissolved. Remove from heat.
- Melt Chocolate: Place chocolate in microwave safe bowl. Heat in 1-minute increments on 50% power to melt, stirring well in between each minute. Alternatively, you can melt chocolate in a double boiler. As soon as all the chocolate has melted, transfer to the bowl of a stand mixer.
- Combine: Using the paddle attachment, beat on low to medium speed, adding one tablespoon of butter at a time until all of the butter has been added and it has melted into the chocolate. With the mixer running, add the coffee sugar mixture and blend until fully mixed. Add the vanilla, then mix well to combine and scrape sides of bowl as needed.
- Mix in Eggs, Add to Pan: With the mixer still running, slowly add eggs. You want them fully incorporated, but you do not want to overly mix the batter. Scrape the sides of the bowl well and give a final stir to make sure everything is fully mixed. Transfer all of the batter to the prepared spring form pan.

Baking
- Bake: Place the aluminum foil lined pan in the water bath and bake in preheated oven for 45-50 minutes. The center of the cake should be set but slightly jiggly.
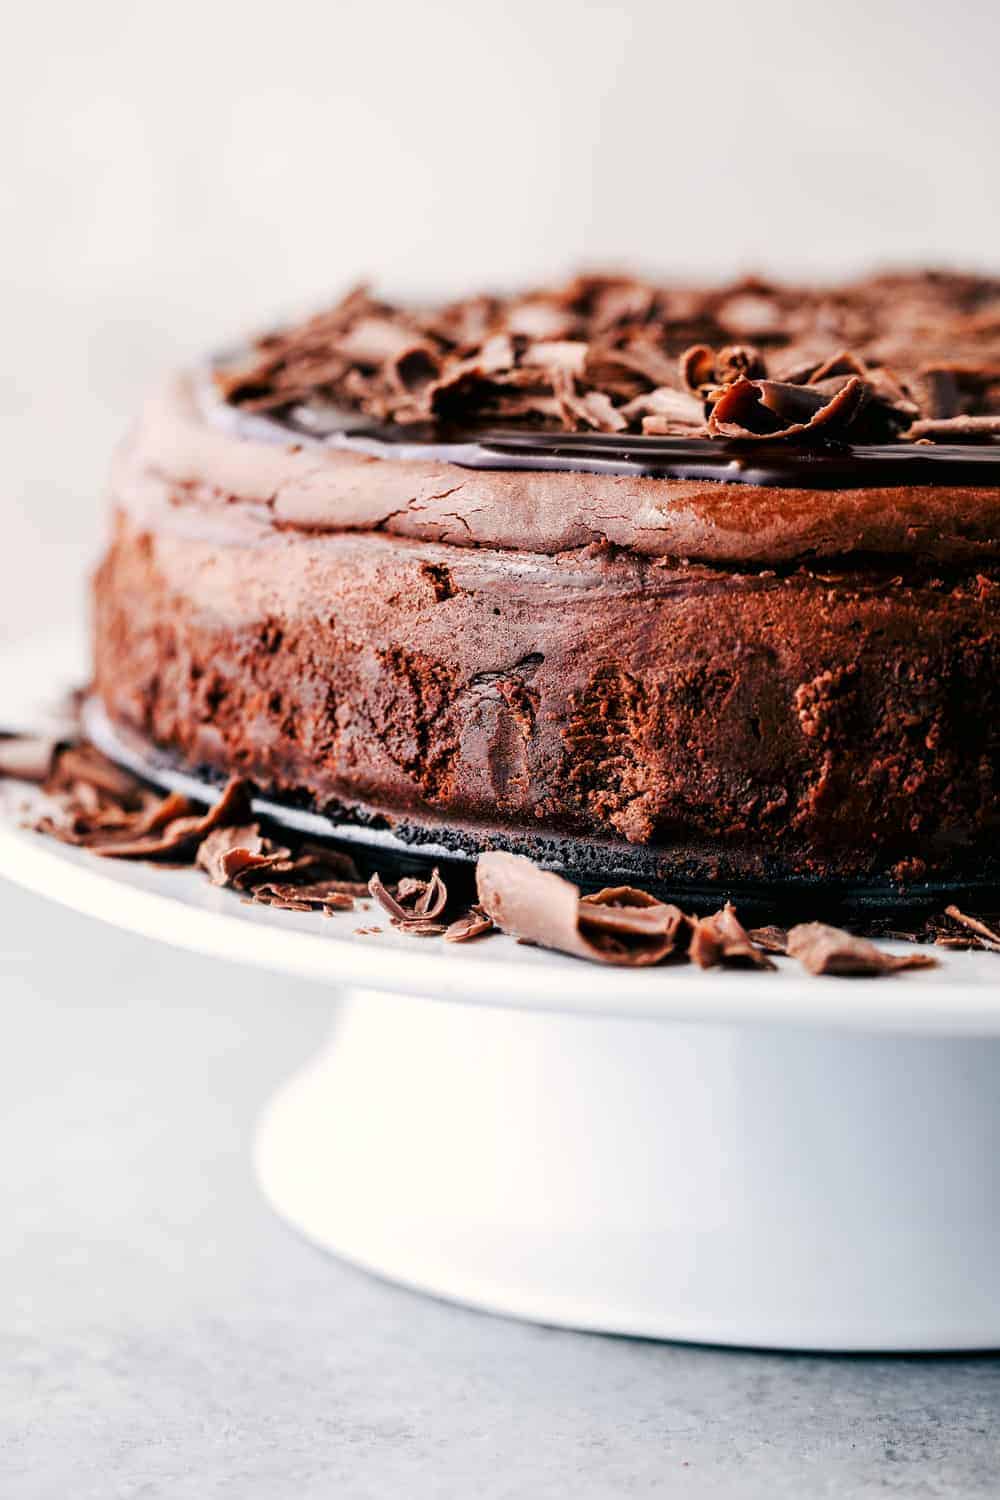
- Chill: For best results, chill cake in pan over night. I was able to skip this step and remove it from the pan a couple hours after I took it out of the oven, but it was even better after a night of refrigeration. To remove from pan, release spring to life side off and transfer to a cake platter.
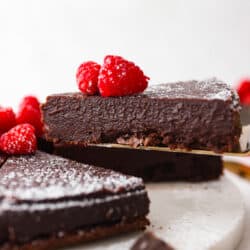
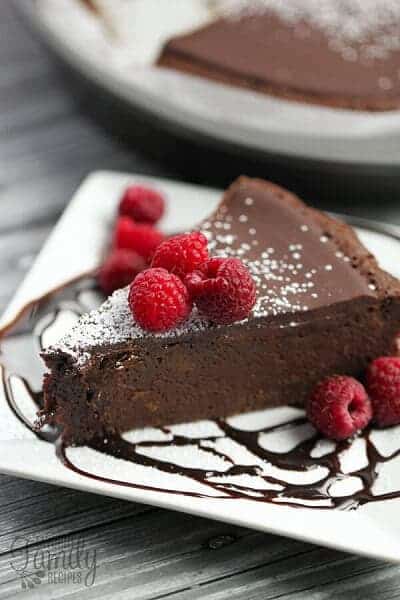
- Serve: Serve flourless chocolate cake with freshly whipped cream or a scoop of vanilla ice cream and fresh berries.
How Do I Know When My Cake is Done?
Much like a cheesecake, you want your flourless chocolate cake to be set yet still a bit jiggly in the middle before you remove it from the oven. The water bath and low cooking temperature really make this recipe difficult to mess up, so don’t worry if you end up taking the cake out of the oven a few minutes early or late.
The “done” window is probably around 10 minutes long, so just keep checking the center as the time approaches.
Tips for Making Flourless Chocolate Cake
- Use High-Quality Chocolate! Since chocolate is one of the main ingredients of this cake, using high-quality chocolate will yield high-quality flavor. Instead of chocolate chips, you may use baking chocolate or chocolate bars, but these will need to be chopped into small pieces before melting.
- Don’t Overmix: Don’t overmix the batter. Mix just until all the eggs are incorporated and the bottom and sides of the bowl have been scraped down and mixed in.
- Using Other Pans: I have seen other people use a cake pan to make flourless chocolate cake, but I haven’t had luck trying it out. The cake tends to stick even with the parchment paper. If you have a smaller springform pan, I recommend cutting the recipe in half.
- Add Grand Marnier: Everyone knows orange and chocolate are a magical duo, so adding orange-flavored liqueur to a flourless chocolate cake seemed like a no brainer to me. You could even take it a step further and add a bit of orange zest as well to really enhance that citrus flavor.

Storing Leftover Cake/ Freezing
Store leftover flourless chocolate cake in an airtight container in the refrigerator for up to 5 days.
You may freeze the whole flourless chocolate cake or individual slices for up to 3 months. Place the cake or slice on parchment paper and then on a baking sheet. Freeze for 3-4 hours until fully frozen, then transfer to an airtight container or a freezer ziploc bag. To thaw, remove the parchment paper and place it on a plate or cake platter. Cover with plastic wrap and leave in the refrigerator for 4-6 hours, or overnight, until completely thawed.
Can Flourless Chocolate Cake Be Made Ahead of Time?
Flourless chocolate cake is a great make-ahead dessert! Make it up to 3 days before serving. Keep chilled in the fridge in an airtight container or on a serving plate covered with plastic wrap.

More Decadent Chocolate Desserts to Indulge In

Pin this now to find it later
Pin It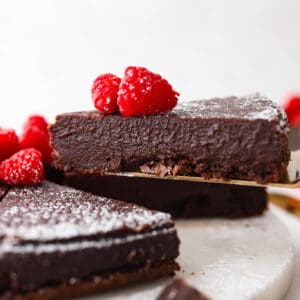
Flourless Chocolate Cake
Ingredients
- 1 ½ cups granulated sugar
- ½ cup strong coffee
- ½ tsp salt
- 18 ounces semi-sweet chocolate chips or bittersweet
- 1 cup unsalted butter softened
- 1 teaspoon vanilla extract
- 6 large eggs, slightly beaten and room temperature
Instructions
- Preheat oven to 350 degrees Fahrenheit. Line the bottom of a 10-inch spring form pan with parchment paper and spray the inside of the pan and the parchment paper well with pan spray. Wrap the bottom of the spring form pan with a couple layers of heavy duty aluminum foil, wrapping the foil all the way up the sides of the pan.
- Add ½ cup strong coffee , 1 ½ cups granulated sugar, and ½ tsp salt to a small saucepan and cook over medium heat until all the sugar is dissolved about 3 minutes. Remove from the heat and set aside.
- Place 18 ounces semi-sweet chocolate chips or bittersweet in a microwave-safe bowl. Heat in 1-minute increments on 50% power to melt, stirring between each minute. Alternatively, you can melt chocolate in a double boiler. As soon as all the chocolate has melted, transfer to the bowl of a stand mixer.
- Using the paddle attachment, beat on low to medium speed, adding one tablespoon of the 1 cup unsalted butter softened at a time until all of the butter has been added and it has melted into the chocolate. With the mixer running, add the coffee and sugar mixture and blend until fully mixed. Add 1 teaspoon vanilla extract and mix well until fully combined. Scrape down the sides and bottom of the bowl as needed.
- With the mixer still running, slowly add 6 large eggs, . You want them fully incorporated, but you do not want to overly mix the batter. Scrape the sides of the bowl well and give a final stir to make sure everything is fully mixed. Transfer all of the batter to the prepared spring form pan.
- Place the aluminum foil-lined pan in the water bath and bake in a preheated oven for 55-60 minutes. The center of the cake should be set and only have a very slight wobble to it.
- For best results, chill the cake in a pan overnight or at least for 4 hours. To remove from the pan, release the spring and open the pan, inverting the cake onto a cake platter. If needed, run a knife around the outside of the cake to help it release from the sides
- Serve with freshly whipped cream or a scoop of vanilla ice cream and fresh berries.
Notes
Nutrition
Nutrition information is automatically calculated, so should only be used as an approximation.


This cake is amazing!!! I made it for my birthday dinner last night and served it with homemade whipped cream and raspberries. Everyone was raving about it!
Excellent first time around! Thank you! I used 1 t instant espresso, Cafe Bustelo, and 1/2 cup water. Freezes very well, too!
Is this gluten free?
Took a little over an hour to cook. It was still of a pudding consistency @ 45min, using a 9″ spring form pan at 300*. I used blonde espresso for the coffee, and it was very strong. Tasted like a cappuccino! ??