
This website may contain affiliate links and advertising so that we can provide recipes to you. Read my disclosure policy.
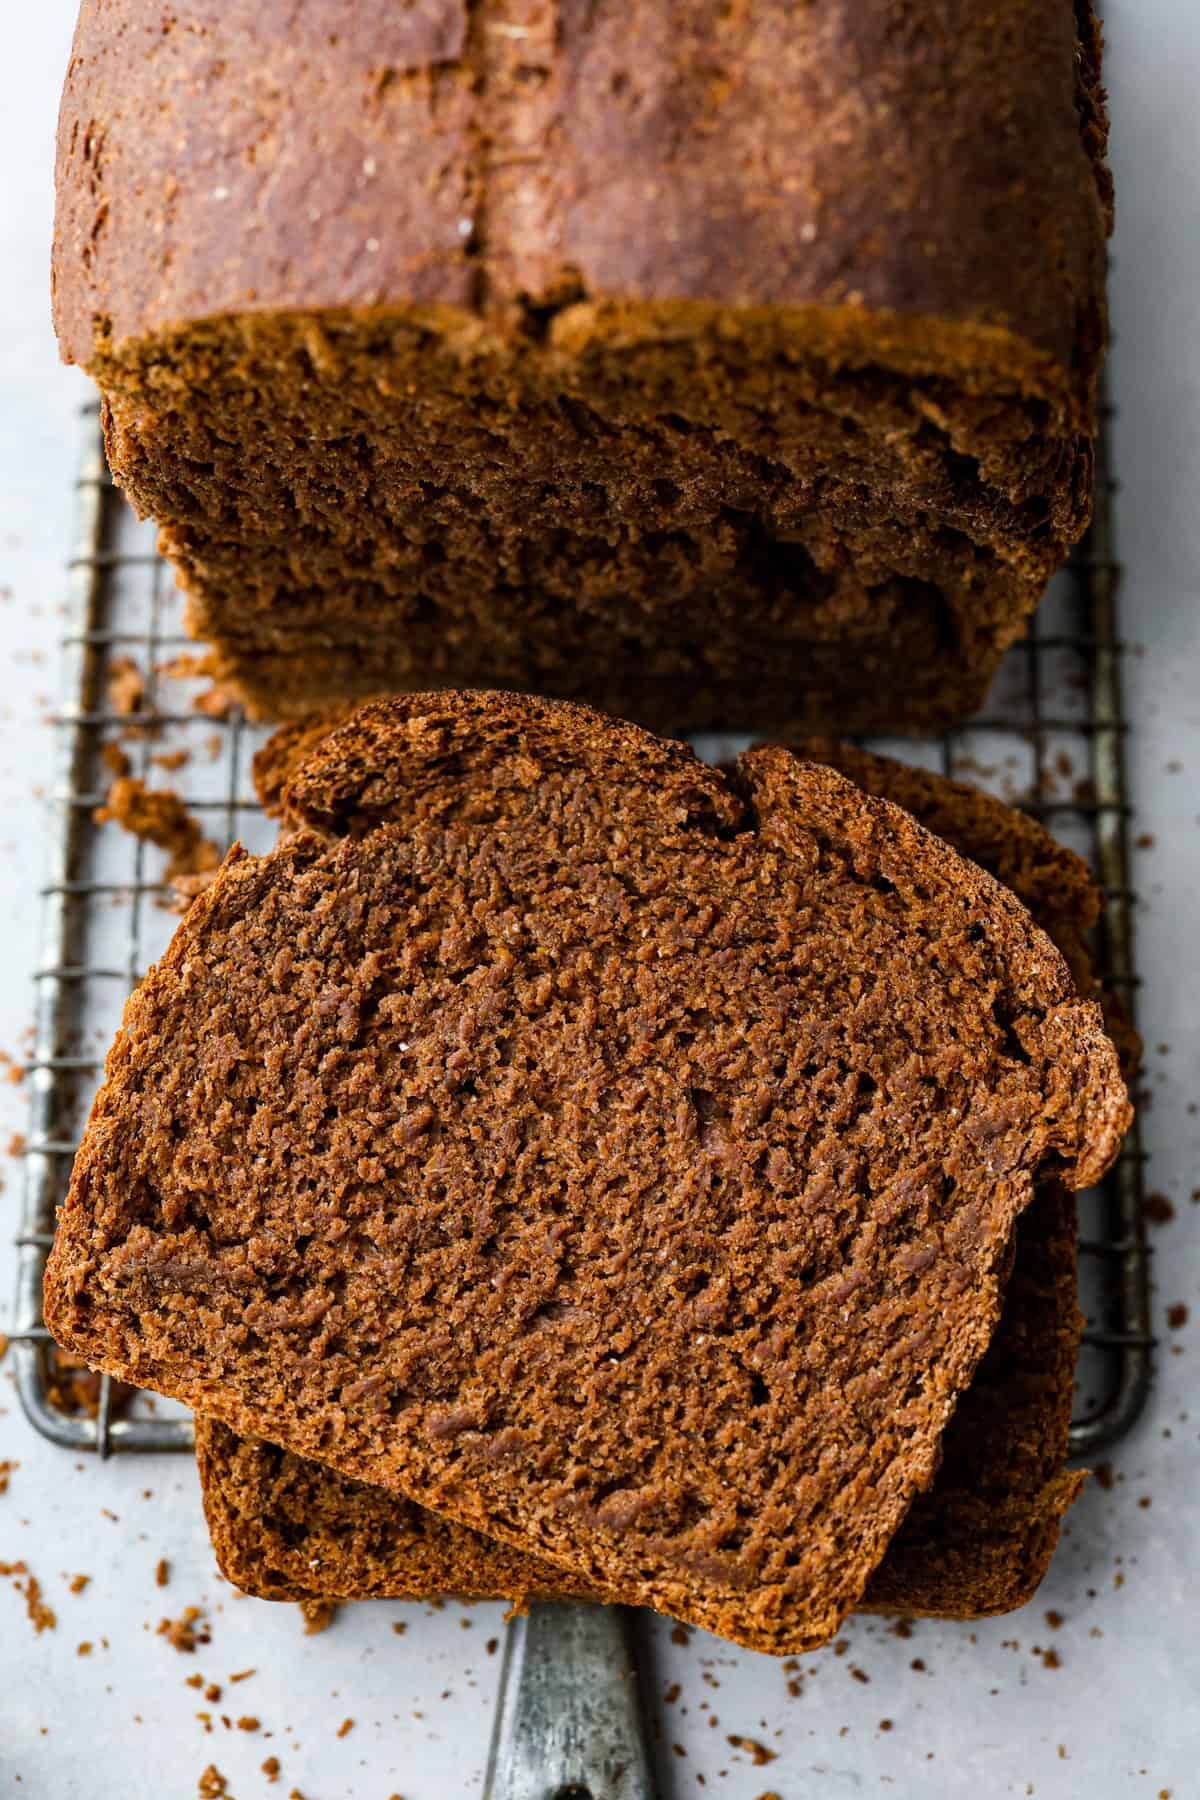
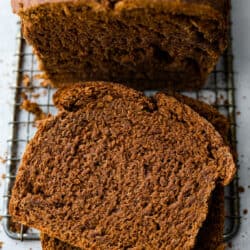
This pumpernickel bread is full of rich and hearty flavor. With three types of flour and brown sugar and molasses, you won’t believe how much you can enjoy this nutrient-rich bread! To top it all off, it has cocoa powder to take things to a whole other level.
This bread will fill your house with the most amazing smells! It’s rich with hearty flours and a hint of cocoa flavor. The color is so inviting and it’s actually a really tender and moist bread. It is a yeasted bread, so if you aren’t quite ready to jump into breadmaking, you can start with this easy Award Winning Banana Bread, this simple Glazed Lemon Bread, or this delicious Cinnamon Bread.

What is Pumpernickel Bread?
Pumpernickel bread is a rich and flavorful combination of molasses, whole wheat, and rye flour. My version is a little more light and fluffy than the traditional sourdough starter more dense bread. This bread is made light and quick with instant yeast and bread flour. It’s sweetened and flavored with brown sugar and molasses, and cocoa powder! I absolutely love the combination of the rich grains and the sweet and bitter cocoa powder. You are going to love it too!
Pumpernickel is similar to rye bread, but it has cocoa powder in it, and I’m told traditional rye bread uses a different type of rye flour. I like to keep my bread recipes as simple as possible so even a beginner can try it out and be successful. This recipe makes a delicious sandwich bread that is ready for toasting and snacking. Pumpernickel French toast? Why not give it a whirl! I’m all about testing new foods to their limits.
Ingredients
Like most bread recipes, if you try to switch up to many ingredients in this pumpernickel bread, then you will get a very different result. I talk a little about flour substitutes here and in the tip box below. If you are new to baking homemade bread, I would stick to these ingredients for the best results! You can find the measurements below in the recipe card.
- Milk: Warm, this helps activate the yeast.
- Brown Sugar: Deepens the flavor and adds sweetness.
- Active Dry Yeast: The leavening agent.
- Molasses: Additional molasses is traditional in pumpernickel bread.
- Butter: The fat in the butter will help to keep this loaf moist and soft.
- Bread Flour: Bread flour has a higher protein content than all purpose flour. You may be able to substitute this for all purpose flour in this recipe because of the rye and wheat flour. I haven’t tried it myself, but let me know in the comments how it turns out if you do!
- Dark Rye Flour: Grinding your own rye berries at home will yield a different type of flour than store bought rye flour. The kind you get from the store was not ground from the whole berry, it has parts removed before grinding. I would stick with storebought, unless you are experienced with baking with your own home ground flours!
- Whole Wheat Flour: Full of great nutrients and benefits, and makes a hearty flavorful bread.
- Cocoa Powder: This gives the bread extra depth of flavor and a hint of sweetness.
- Salt: To balance out and bring out all the flavors.

Pumpernickel Bread Recipe
As far as bread recipes go, this pumpernickel bread is super straightforward! If you are generally comfortable with baking yeast breads, then you are going to love taking your skills a step further with this unique bread. It’s going to take around 3 hours from start to finish, and once you get it down you’ll have it ready in 2 1/2.
Make Dough
- Activate Yeast: To the bowl of your stand mixer, add the warm milk, brown sugar, and yeast. Stir to combine and allow the yeast to become frothy. About 5 minutes.
- Mix Dough: Once the yeast is ready, add the molasses, butter, bread flour, rye flour, wheat flour, cocoa powder, and salt. Using your dough hook attachment, on low speed, mix the dough until it comes together, about 4 minutes.
- Knead Dough and Rest: Increase the speed to medium and mix for an additional 3-4 minutes to help develop the gluten. Remove the dough from the bowl and place it in an oiled bowl. Then cover and let the dough rest for an hour. The dough should double in size. Prepare a loaf pan by spraying it with cooking spray.
Shape and Bake
- Shape: Once the dough has doubled in size, dump it out of the bowl onto a lightly floured surface and pound the air out of it and form it into a batard (a football shape) by folding the top into a point and rolling that point down and into the loaf, roll until you have reached the end of the dough and then pinch the seams together.
- Put in Pan and Rest: Place the loaf seam side down in the prepared loaf pan and then preheat your oven to 375 degrees Fahrenheit. Cover your loaf and then let it rise until it comes about an inch above the edges of the pan, and fills the pan in completely.
- Bake: Bake the loaf for 30-40 minutes, the internal temperature should reach 190 degrees Fahrenheit. Once the loaf has finished baking, then remove it from the pan to let it cool to room temperature.

Tips for Making Pumpernickel Bread
With any bread recipe, including this pumpernickel bread, once you change something there will be a different reaction. Every bread is a science and you never know if you have the perfect environment for your changes. I can suggest some changes here, but I haven’t had a chance to test all of the variations. If you do experiment you have to let me know how it goes in the comments!
- Molasses or Treacle: Molasses and Treacle are similar enough that they make great substitutions. If you have one or the other in your pantry, it will work perfectly!
- Rye Flour Substitute: If you don’t have rye flour, you can use the same amount of wheat flour in place of rye. It’s a great 1:1 substitute in this recipe.
- Dry Bread: Wheat bread has a reputation of being dry. The whole grain soaks up more moisture than all purpose flour, which can leave your loaf dry and crumbly when not handled correctly. This recipe gives an hour of resting time for the bread to proof so that the grains have time to soften and soak up the moisture. This bread also calls for milk and butter and molasses which aid in softening up the loaf. You should NOT have a dry loaf!

Storing Leftovers
Homemade pumpernickel bread has no preservatives, so it’s important to store it correctly to stay fresh. Here is how to store your bread.
- On the Counter: Make sure your bread has completely cooled. Store bread in an airtight plastic bag or airtight container on the counter for up to a week.
- In the Refrigerator: Store your bread in a plastic bag in the refrigerator for up to two weeks.
More Bread Recipes
The world of breadmaking is a satisfying and sometimes daunting one. And yes, I’m talking about actual bread! I think that every home chef should have a great bread recipe up their sleeve, so I’m sharing a few of my favorites that I think you’ll absolutely love.
Pin this now to find it later
Pin It
Pumpernickel Bread
Ingredients
- 1 cup milk, warm
- 2 tablespoons brown sugar
- 1 package active dry yeast, or 2 ¼ teaspoons
- ¼ cup molasses
- ¼ cup butter, softened
- 1 ½ cup bread flour
- 1 cup dark rye flour
- ¼ cup whole wheat flour
- ¼ cup unsweetened cocoa powder
- 1 ½ teaspoon salt
Instructions
- To the bowl of your stand mixer, add the warm milk, brown sugar, and yeast. Stir to combine and allow the yeast to become frothy. About 5 minutes.
- Once the yeast is ready, add the molasses, butter, bread flour, rye flour, wheat flour, cocoa powder, and salt. Using your dough hook attachment, on low speed, mix the dough until it comes together, about 4 minutes.
- Increase the speed to medium and mix for an additional 3-4 minutes to help develop the gluten. Remove the dough from the bowl and place it in an oiled bowl. Cover and let the dough rest for an hour. The dough should double in size. Prepare a loaf pan by spraying it with cooking spray.
- Once the dough has doubled in size, dump it out of the bowl onto a lightly floured surface and pound the air out of it and form it into a batard (a football shape) by folding the top into a point and rolling that point down and into the loaf, roll until you have reached the end of the dough and pinch the seams together.
- Place the loaf, seam side down in the prepared loaf pan and preheat your oven to 375 degrees fahrenheit. Cover your loaf and let it rise until it comes about an inch above the edges of the pan, and fills the pan in completely.
- Bake the loaf for 30-40 minutes, the internal temperature should reach 190 degrees fahrenheit. Once the loaf has finished baking, remove it from the pan to let it cool to room temperature.
Notes
Nutrition
Nutrition information is automatically calculated, so should only be used as an approximation.


Do you have the recipe with metric weights for the ingredients?
I’m sorry, I don’t have that at this time.
I too should have read the comments. Followed recipe exactly, except I left it for 1 1/2 hours to rise. Came home from the store and pulled from the proofing oven and there has been no change in the lump of dough. Very disappointed and now that I’ve wasted time and ingredients I have to find another recipe and try again. Hope I can get it made in time for dinner…
I did learn a valuable lesson, always read the comments on new recipes!
I should have read the comments. UGH
way too dense didn’t rise at all
Something is missing from ingredients. To me it seems it needs more liquid. A lot of yeast for little liquid and flour
Don’t bother. Like the comments say, multiple attempts, good yeast at beginning, but zero rise.
Tried it twice, both times it was too dense to rise.
Tried 3 times and never got a good rise. Dough seems to be too dense. Oh well.
1 tablespoon of salt is way too much, the bread didn’t rise right, and was inedible. Huge disappointment
I’m sorry this recipe didn’t work out for you!
My bread is taking a *very* long time to rise and I think it may be due to the amount if salt. 1 Tbs is quite a bit for a single loaf of bread, any chance it’s supposed to be 1 tsp? My kitchen is plenty warm and the rest of the ingredient ratio’s seem correct.
The recipe ingredients says 1 1/2 Cups bread flour and the instructions say 2Cups bread flour.???
It’s 1.5 cups of flour. Thanks for noticing that! It’s all fixed!
Can this and some of the other breads be made in a bread machine?
Quick breads typically aren’t cooked in a bread machine because they are no yeast recipes. However, if your bread machine has a cake setting, then you can use that for this bread.