

This website may contain affiliate links and advertising so that we can provide recipes to you. Read my disclosure policy.
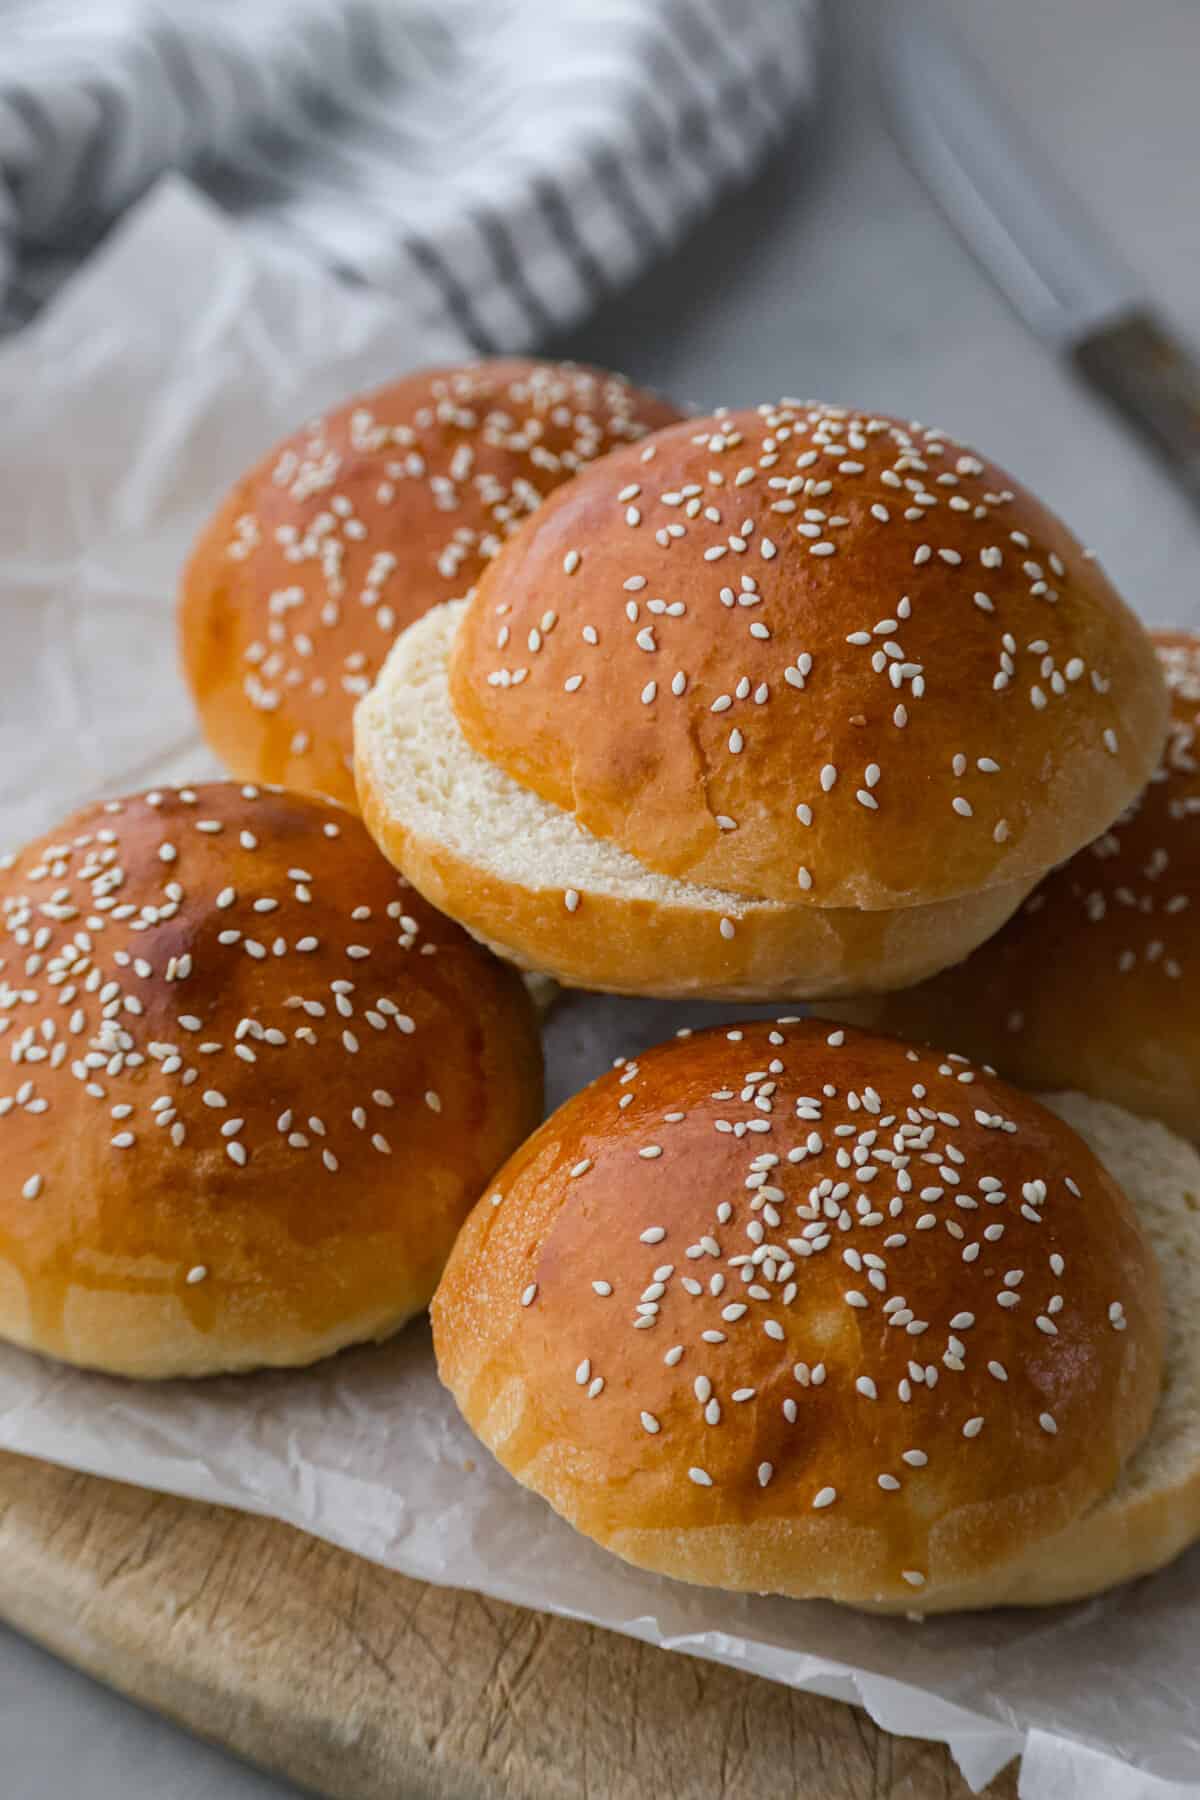
A good hamburger bun can make all the difference! This Brioche Bun is hands down the BEST bun for hamburgers, sloppy joes, and so much more. It’s fluffy, soft, and oh so good.
I used to think that making bread at home was too time-consuming. Why make it when it’s easy to buy at the grocery store? Well, I’ve definitely changed my mind the last few years! Homemade bread has WAY less ingredients, tastes so much better, and is much better for you. A few bread recipes that I always make at home (and that are really simple and quick) are Grandma’s Perfect Homemade Bread, this Focaccia Bread, and this simple Sourdough Bread.

Brioche Bun
If you have ever order a burger at a restaurant on a brioche bun, then you know how absolutely heavenly they are! They are definitely the best bun I’ve ever had, and you’ll be so happy to know that they are really easy to make at home! It is a yeast bread, so make sure you have some dry instant yeast on hand. Other than that, simple pantry items come together to make the most amazing bread you’ve ever had. It’s buttery and fluffy and will take your burgers to the next level.
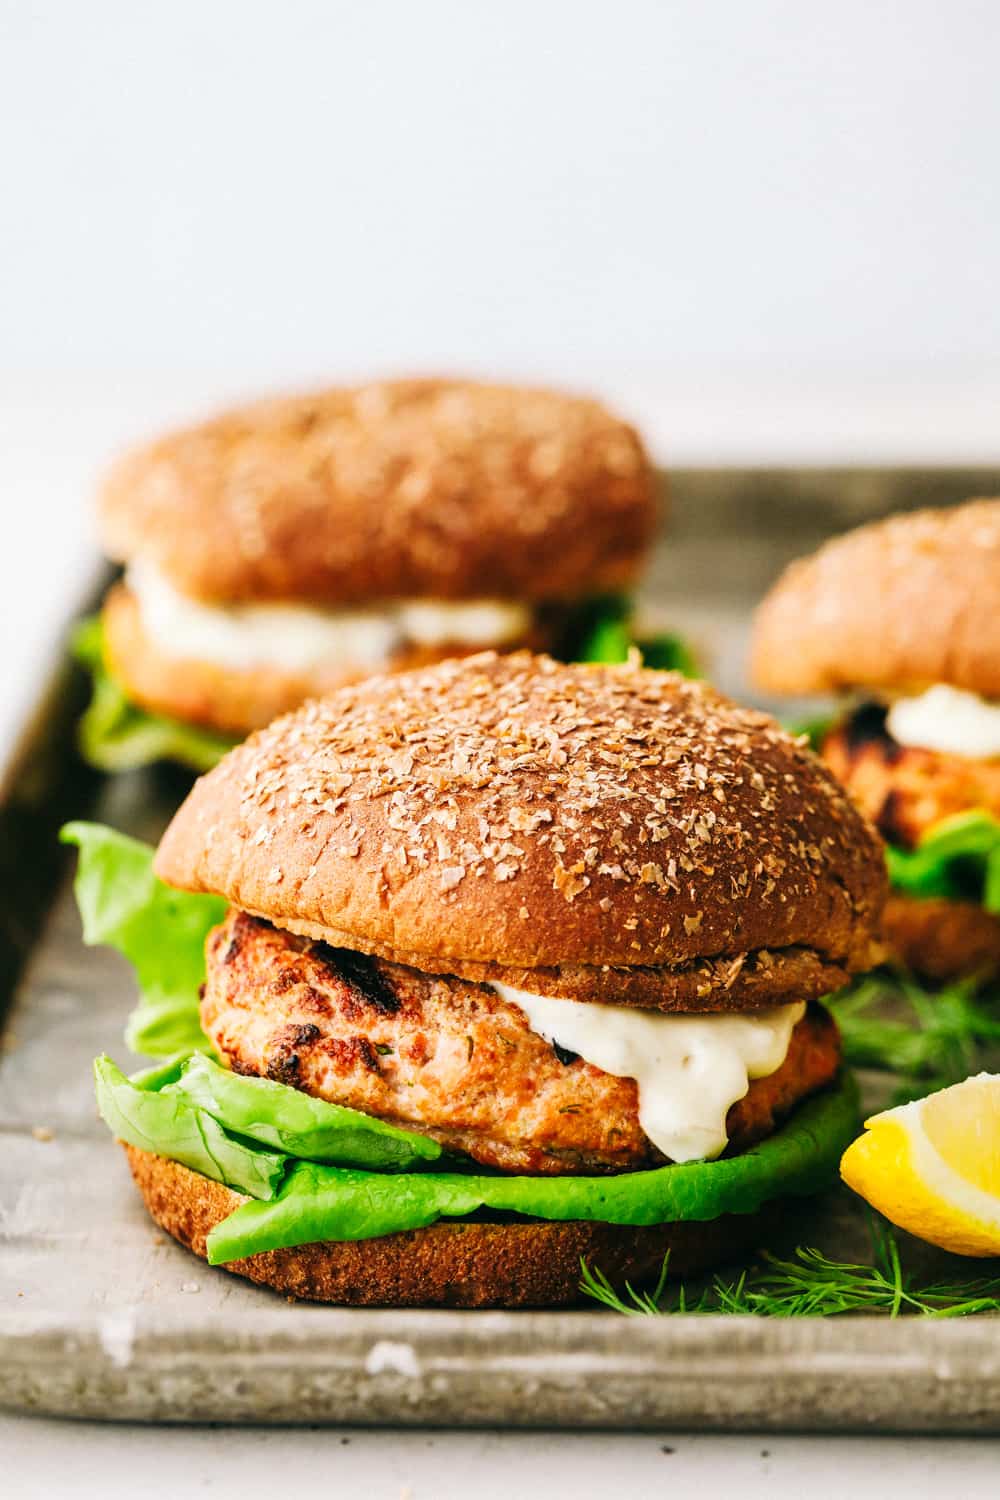
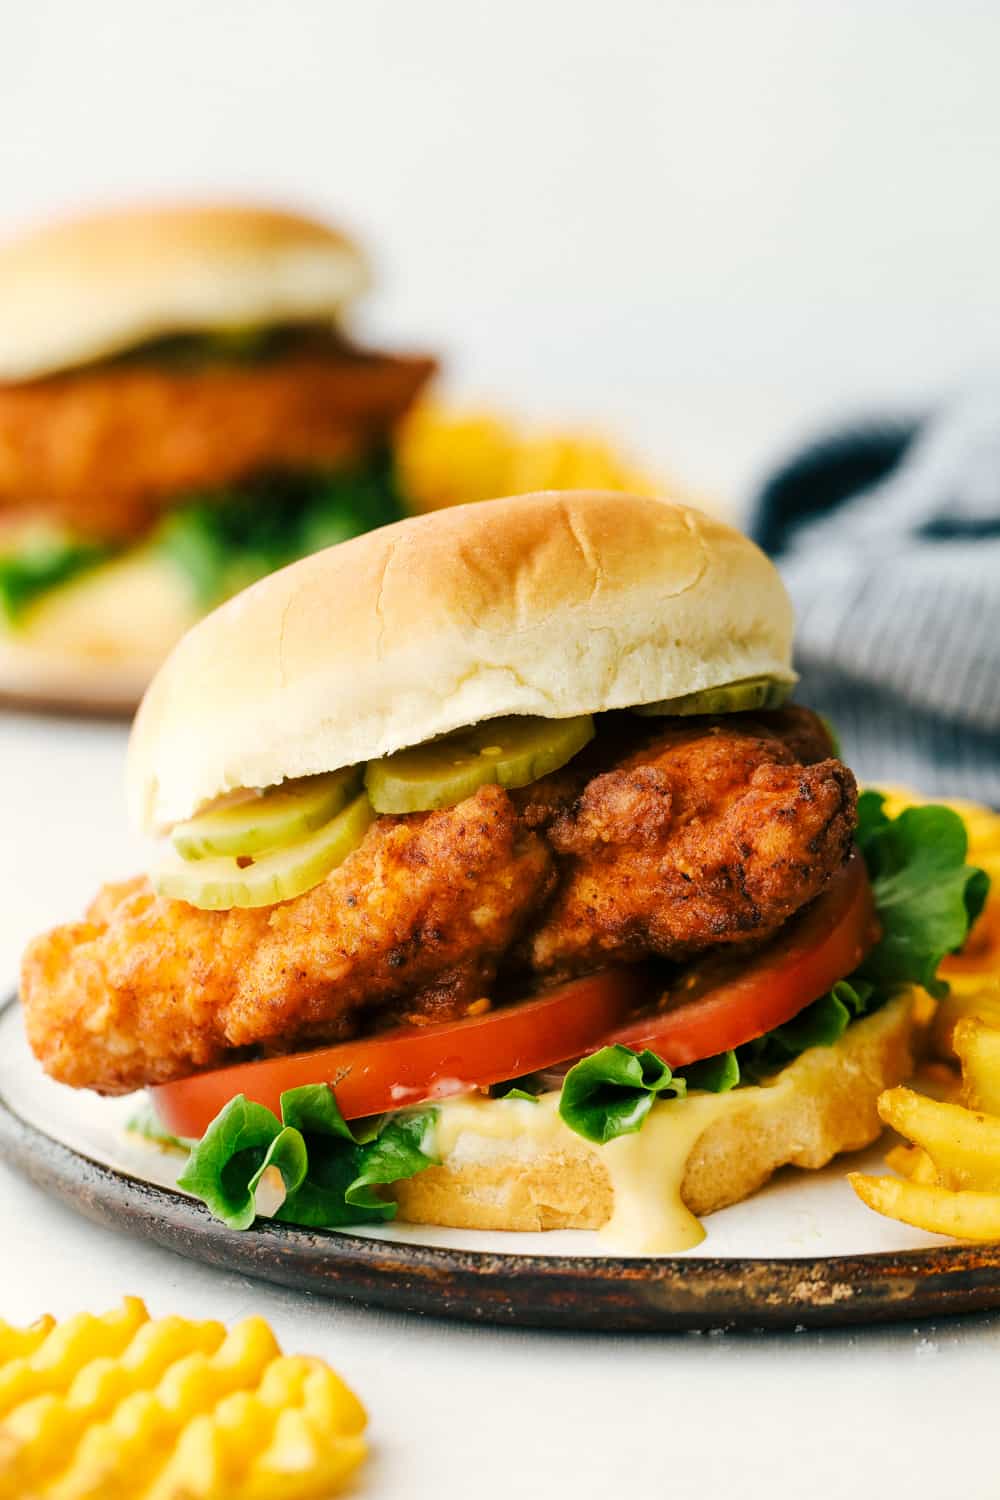
But why stop at just a hamburger? These buns are incredible with sloppy joes, or a slow cooker Mississippi pork roast. Why not put your egg salad, or delicious chicken salad on this bun? Once you try this recipe, you will want to try these out with everything. They are just that good! So lets get baking.
Ingredients
You just need the basic bread ingredients for these brioche buns. They do also have eggs and butter, which is what makes this bread so soft and fluffy! The texture is so much better than the ones you buy at the store. You can find the measurements below in the recipe card.
Brioche Bun Dough Ingredients
- Milk: I like to use whole milk, but you can use whatever milk you want. It should be warm to help the yeast froth.
- Dry Yeast: You will activate the yeast with milk and sugar. Yeast helps the dough rise.
- Sugar: This helps to feed the yeast.
- Butter: Butter adds extra fat to the bread, which makes it so soft and fluffy!
- Eggs: You will want to leave two eggs out at room temperature for a few hours. The dough will be better with room temperature eggs.
- Salt: Salt actually helps in the baking process, and brings out all of the yummy flavors.
- All-Purpose Flour: This is the easiest to work with.
Egg Wash
- Egg: I use the whole egg for this egg wash.
- Water: Two tablespoons to help break up the egg.
- Sesame Seeds: This is an optional garnish on top after you egg wash the top of the dough.

Brioche Bun Recipe
Brioche buns are a very simple bread to make. You can make them in a stand mixer, or the old fashioned way, in a large bowl with a wooden spoon! I like making it by hand most of the time actually. It just feels so good to knead dough and you can feel exactly when it’s ready. If you choose to make this recipe by hand, you follow all of the same instructions, just mix things in a large bowl. Then when it’s time to knead, turn the dough out onto a clean surface and knead. It is a sticky dough, so resist the urge to add too much extra flour or your dough will become stiff and dry.
Make Dough
- Activate Yeast: In the bowl of a stand mixer, combine your warm milk, yeast, and 1 tablespoon of your sugar. Allow the mixture to sit for about 5 minutes until the yeast becomes active and foamy.
- Mix Wet Ingredients: Add in the rest of the sugar, butter, and eggs. Mix using the whisk attachment on medium high speed until everything comes together.
- Add Flour and Knead: Add 2 cups of flour and your salt into the bowl and switch out the whisk for the dough hook, mix at low speed until the flour is fully incorporated, at this point you can determine if you need to add more flour, the dough should pull clean from the mixer when it is the right consistency, but not be too stiff, it should be slightly sticky.
- Knead: Increase the speed to a medium high speed and mix for an additional 3-4 minutes. This last step will knead the dough and build the strength of the gluten.
- Rest: Remove the dough from your mixer and place it into an oiled bowl, cover with plastic wrap and keep covered for about an hour, until the dough doubles in size.
Shape Dough and Bake
- Fold and Shape: Once your dough has doubled in size, fold it by tipping the dough out onto a lightly floured surface and pounding the air out of it. Roll it back into a ball and place back into your oiled bowl, cover and let rest for another 30-45 minutes. It should rise up again and be airy, but not quite double in size.
- Prep Pan: Prepare a baking sheet by lining it with parchment paper, set aside.
- Cut and Shape: Tip the dough out onto a lightly floured surface once again and pat flat, cut the dough into 6 equal pieces. Roll each cut of dough into a ball and place them all on your prepared parchment lined baking sheet, spacing them out evenly. Cover your formed buns and allow them to rise for another 30-45 minutes, until they are nearly doubled in size.
- Preheat Oven: While your buns proof, preheat your oven to 375 degrees fahrenheit.
- Egg Wash and Bake: Once your buns are ready, uncover and brush each one with egg wash and sprinkle with sesame seeds, if you are using them. Bake the buns for 15-18 minutes until they are golden brown and temps out to 190 degrees fahrenheit.

Tips for Making Brioche Buns
I have really enjoyed making bread for many years, and I’ve picked up a few tricks along the way. Here are a few tips for when you go to make this brioche bun recipe.
- Brioche Buns Loaf: When I am making brioche bread, sometimes I like to make a bun loaf. You follow this exact recipe, except you place the buns in a loaf pan (touching each other so there are no spaces) and bake at 325 degrees for 30-45 minutes. You end up with this beautiful loaf of bread that tears away into cute little rolls. It’s just a fun way to change up the recipe!
- Activating Yeast: When you are activating dry yeast, you want to use a warm liquid and some sugar. It should take about 5 minutes for the yeast to get frothy. If it doesn’t look like it’s activated after 5 minutes, there is a chance that the yeast is old or the milk was too cold. You will want to start over, make sure that yeast get’s activated!
- Sticky Dough: Brioche is a sticky dough. You may be tempted to add extra flour, but this will make the dough more dense and stiff, and DRY! Which nobody wants when it comes to bread. So resist the urge, and let that dough stay sticky! Of course if it’s absolutely unmanageable and you can’t even touch it without it being a sticky mess, add more flour. Just try not to overdo it.

Storing Leftovers
Brioche buns are pretty easy to store. They don’t last as long as store bought buns because they don’t have any preservatives. So here are my tips for storing your homemade hamburger buns.
- On the Counter: Allow your buns to cool completely, and then store in a plastic bag or airtight container on the counter for up to 5 days If you don’t plan on eating them that quickly, pop them in the fridge or freezer to extend their shelf life.
What to Have with Brioche Buns
Brioche buns are super versatile, I love using them for just about everything. Here are a few of my favorite recipes that I’ve made with this brioche bun that I just know you’ll love too!

Pin this now to find it later
Pin It
Brioche Buns
Ingredients
- 1/2 cup milk warm
- 1 packet instant dry yeast 2 ½ teaspoons
- ¼ cup granulated sugar divided
- 6 tablespoons unsalted butter softened
- 2 eggs room temperature
- 1 teaspoons salt
- 2-3 cups all purpose flour
Egg wash
- 1 large egg
- 2 tablespoons water
- Sesame seeds for topping optional
Instructions
- In the bowl of a stand mixer, combine your warm milk, yeast, and 1 tablespoon of your sugar. Allow the mixture to sit for about 5 minutes until the yeast becomes active and foamy.
- Add in the rest of the sugar, butter, and eggs. Mix using the whisk attachment on medium high speed until everything comes together.
- Add 2 cups of flour and your salt into the bowl and switch out the whisk for the dough hook, mix at low speed until the flour is fully incorporated, at this point you can determine if you need to add more flour, the dough should pull clean from the mixer when it is the right consistency, but not be too stiff, it should be slightly sticky.
- Increase the speed to a medium high speed and mix for an additional 3-4 minutes. This last step will knead the dough and build the strength of the gluten.
- Remove the dough from your mixer and place it into an oiled bowl, cover with plastic wrap and keep covered for about an hour, until the dough doubles in size.
- Once your dough has doubled in size, fold it by tipping the dough out onto a lightly floured surface and pounding the air out of it. Roll it back into a ball and place back into your oiled bowl, cover and let rest for another 30-45 minutes. It should rise up again and be airy, but not quite double in size.
- Prepare a baking sheet by lining it with parchment paper, set aside.
- Tip the dough out onto a lightly floured surface once again and pat flat, cut the dough into 6 equal pieces. Roll each cut of dough into a ball and place them all on your prepared parchment lined baking sheet, spacing them out evenly. Cover your formed buns and allow them to rise for another 30-45 minutes, until they are nearly doubled in size.
- While your buns proof, preheat your oven to 375 degrees fahrenheit.
- Once your buns are ready, uncover and brush each one with egg wash and sprinkle with sesame seeds, if you are using them. Bake the buns for 15-18 minutes until they are golden brown and temps out to 190 degrees fahrenheit.
Nutrition
Nutrition information is automatically calculated, so should only be used as an approximation.


Absolutely delicious. I had one with fried rock cod fillet yesterday, and then one with honey. Great!
I am making the next batch now